
Yesterday, we held our Steaming Stems session with mixed results.
The weather was great: It was right around the freezing point, and the morning was bright and sunny. Later it clouded over but there were still a few sunny breaks. Light winds meant working outside would not be bone-chilling. This contrasts with Cleveland, where the Morgan Conservatory had to postpone their kozo harvest because of heavy snow over the past few days.
The first disappointment was that no one dropped in to visit. I guess there aren’t many paper makers close enough to us to make the trip. The fact that we’re terrible at publicity doesn’t help either…
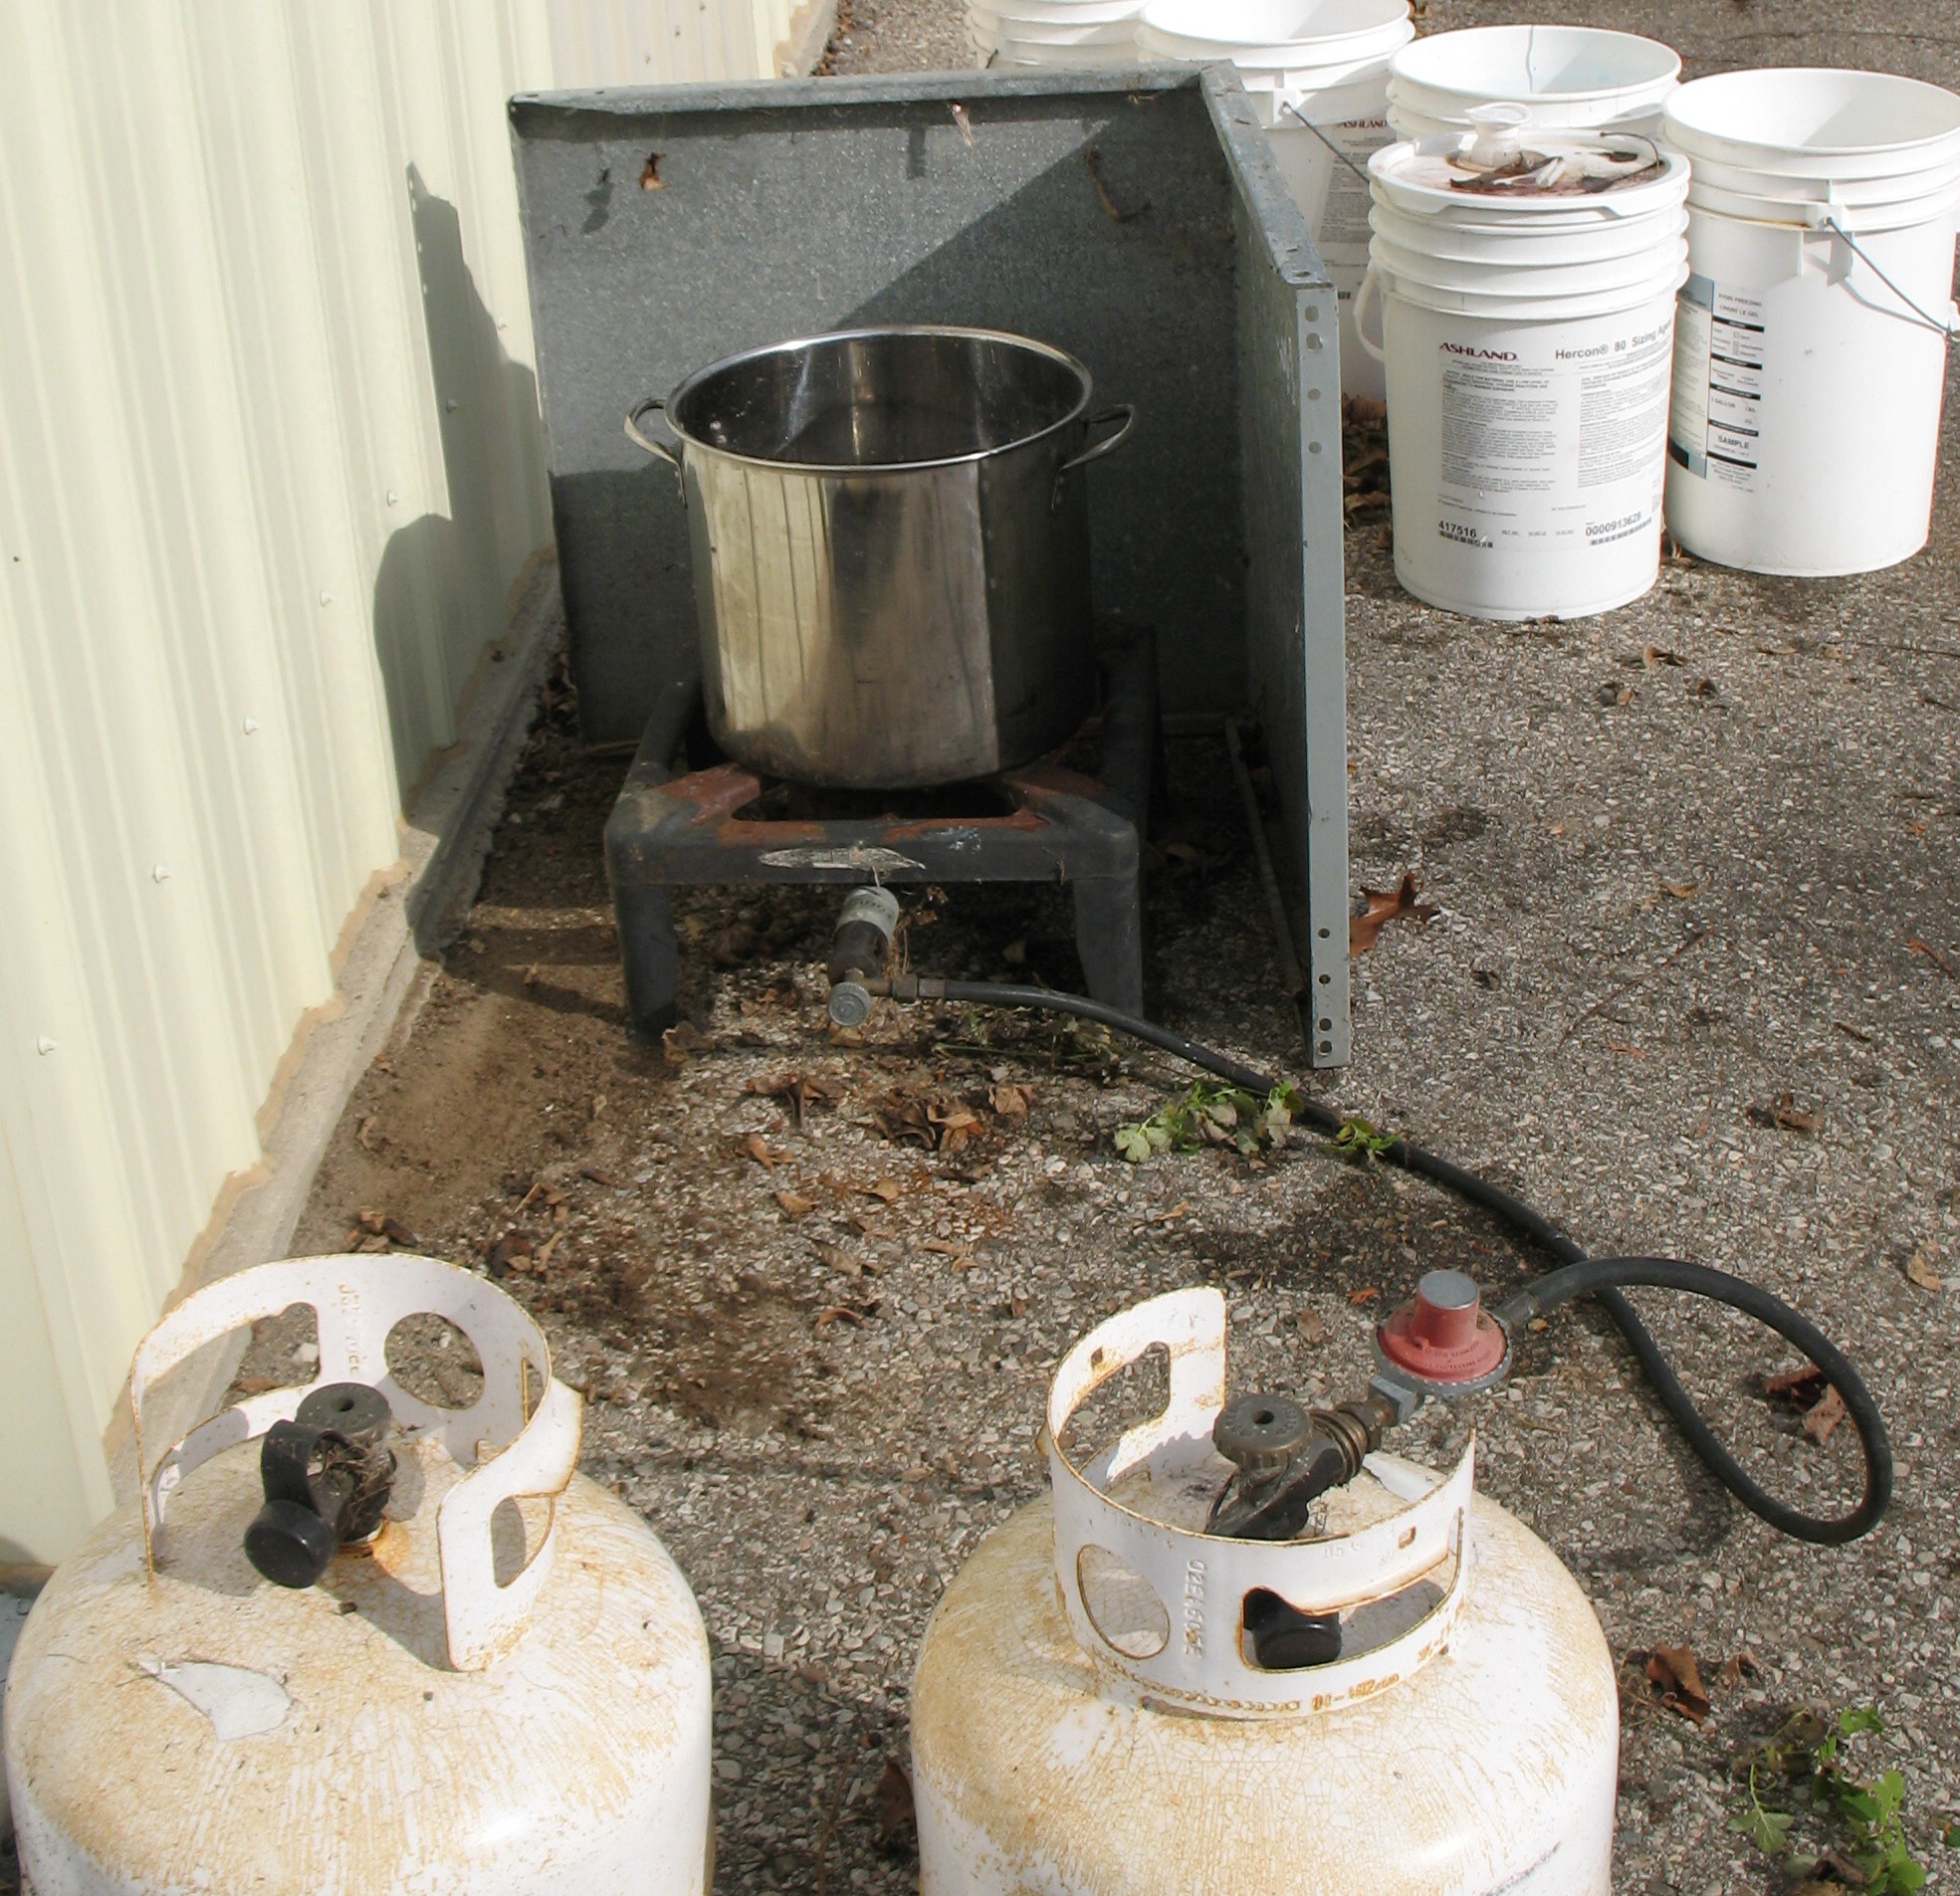
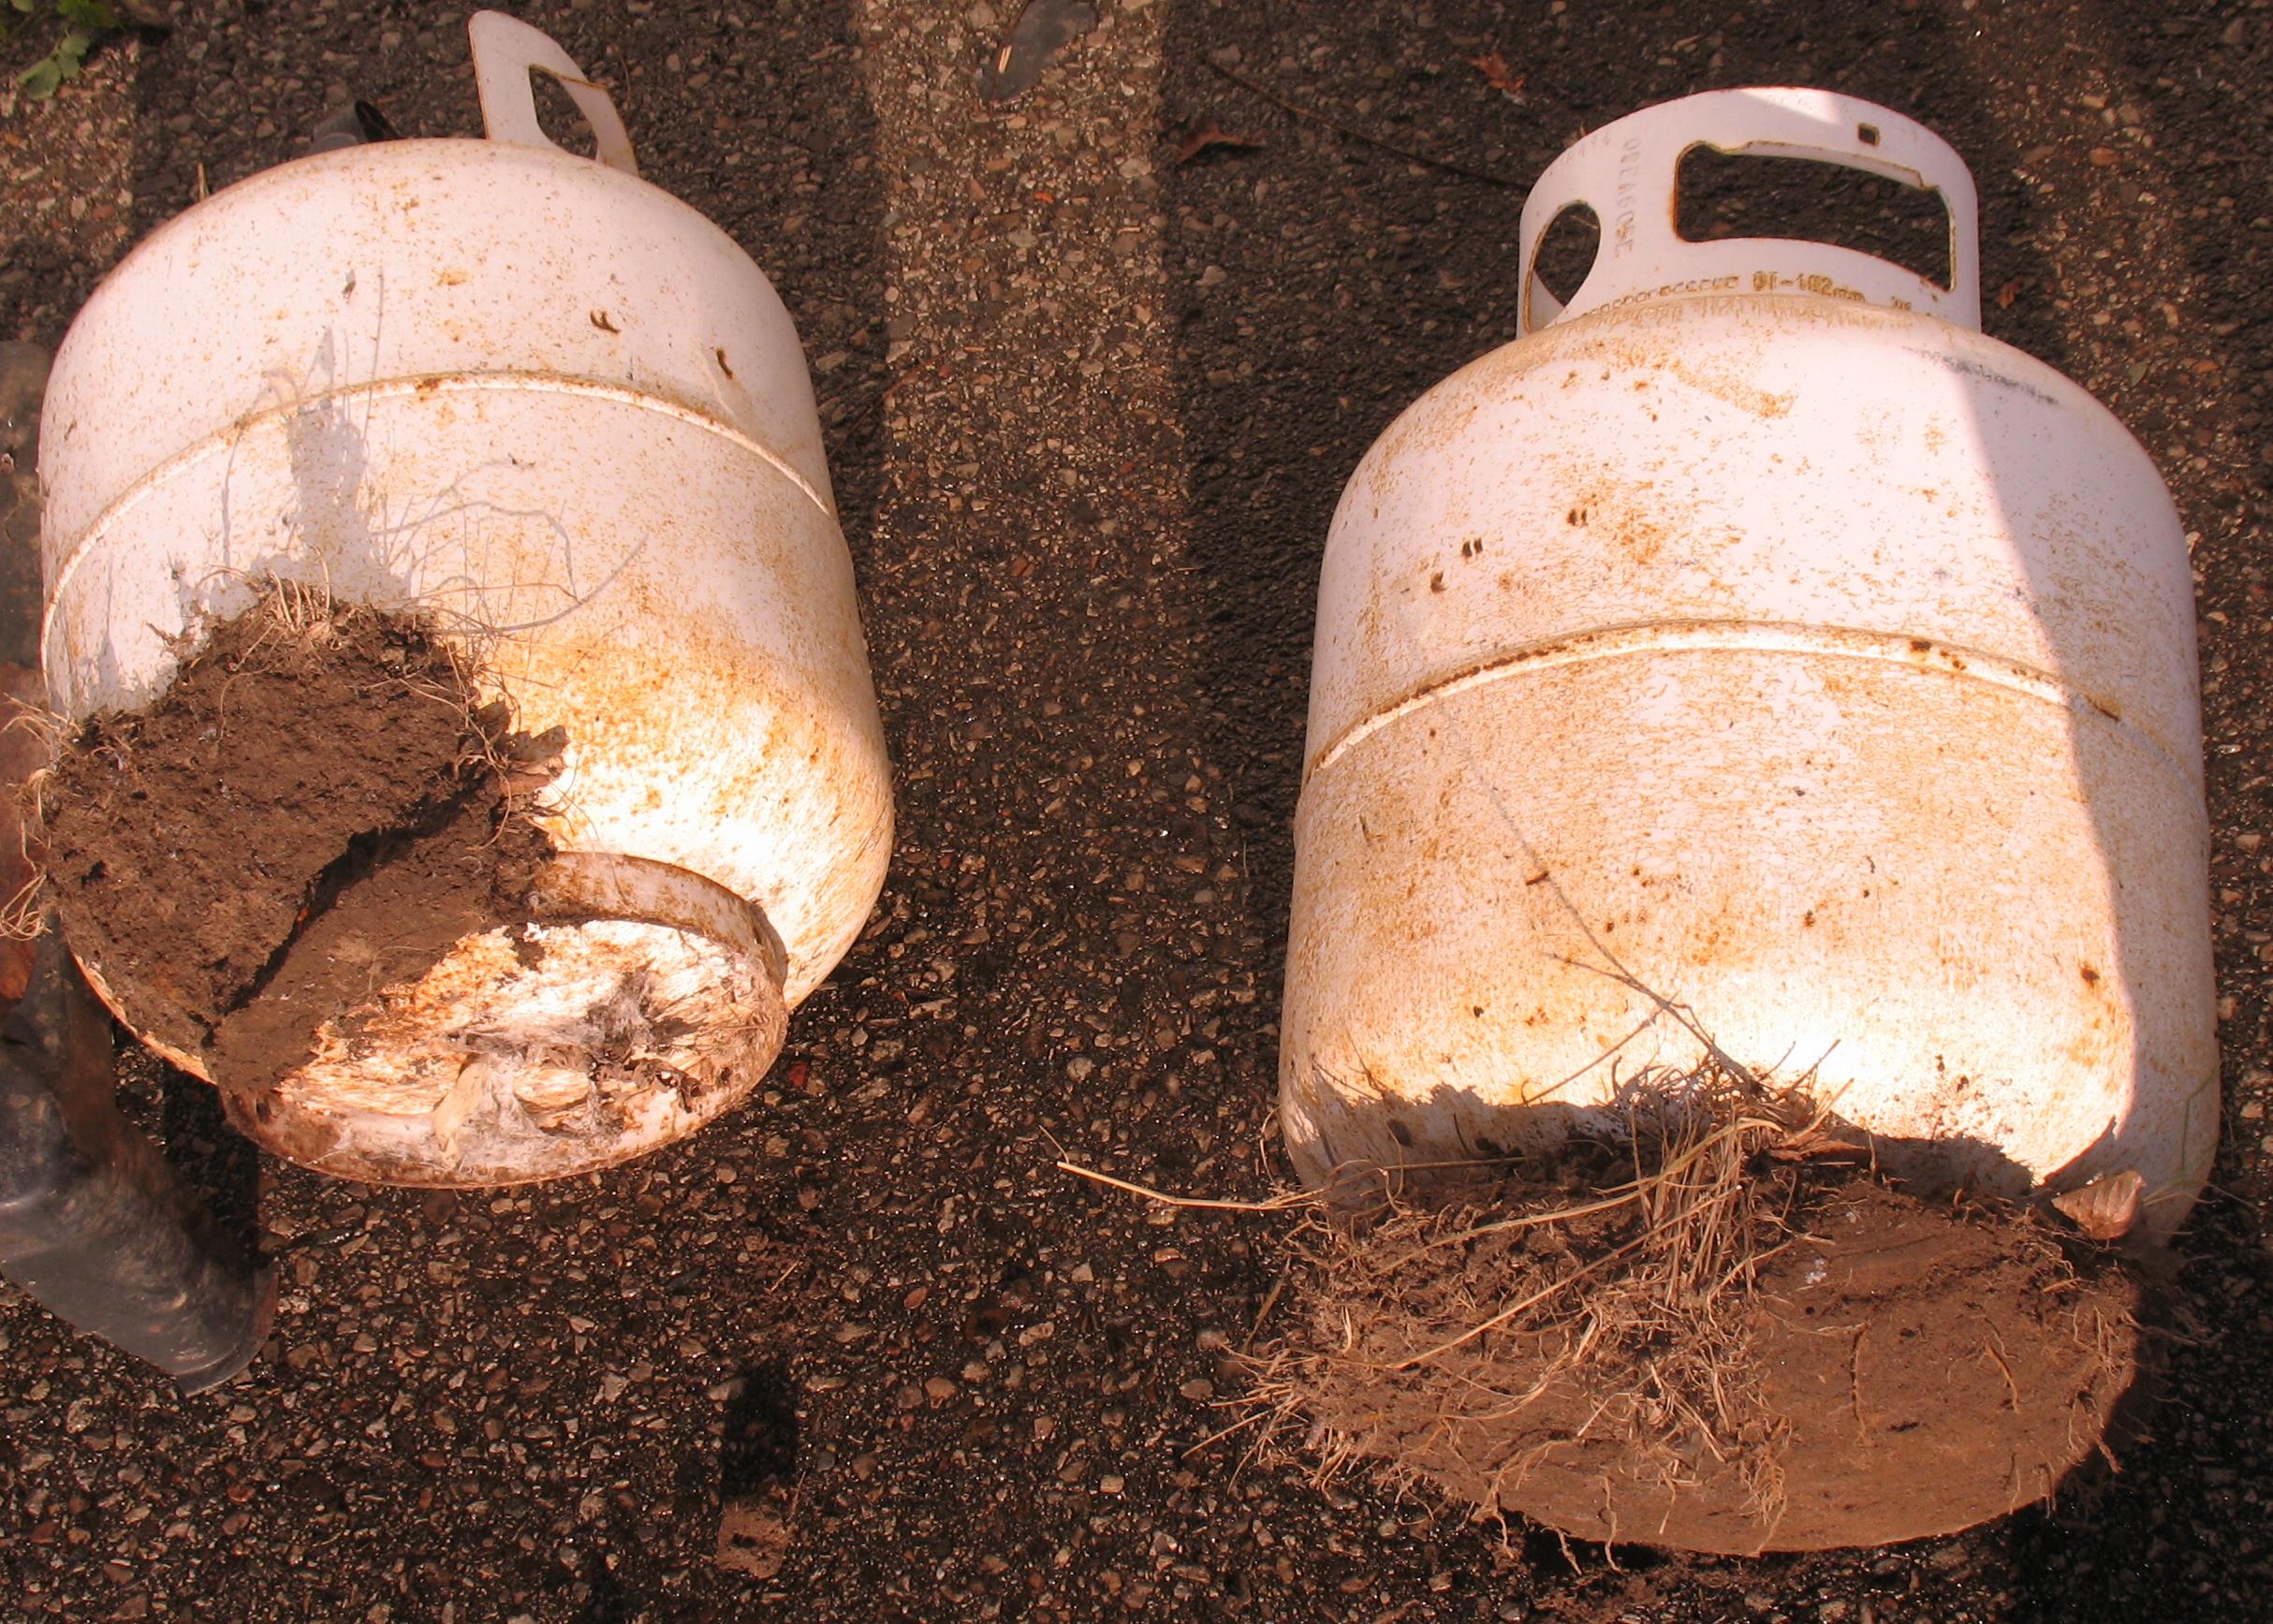 Our first (small) problem was that our propane tanks both had a lump of sod frozen to their bases and would not stand upright.
I found this out early enough that by laying them on their sides in the sun, the sod was thawed and could be knocked off by the time I needed the propane.
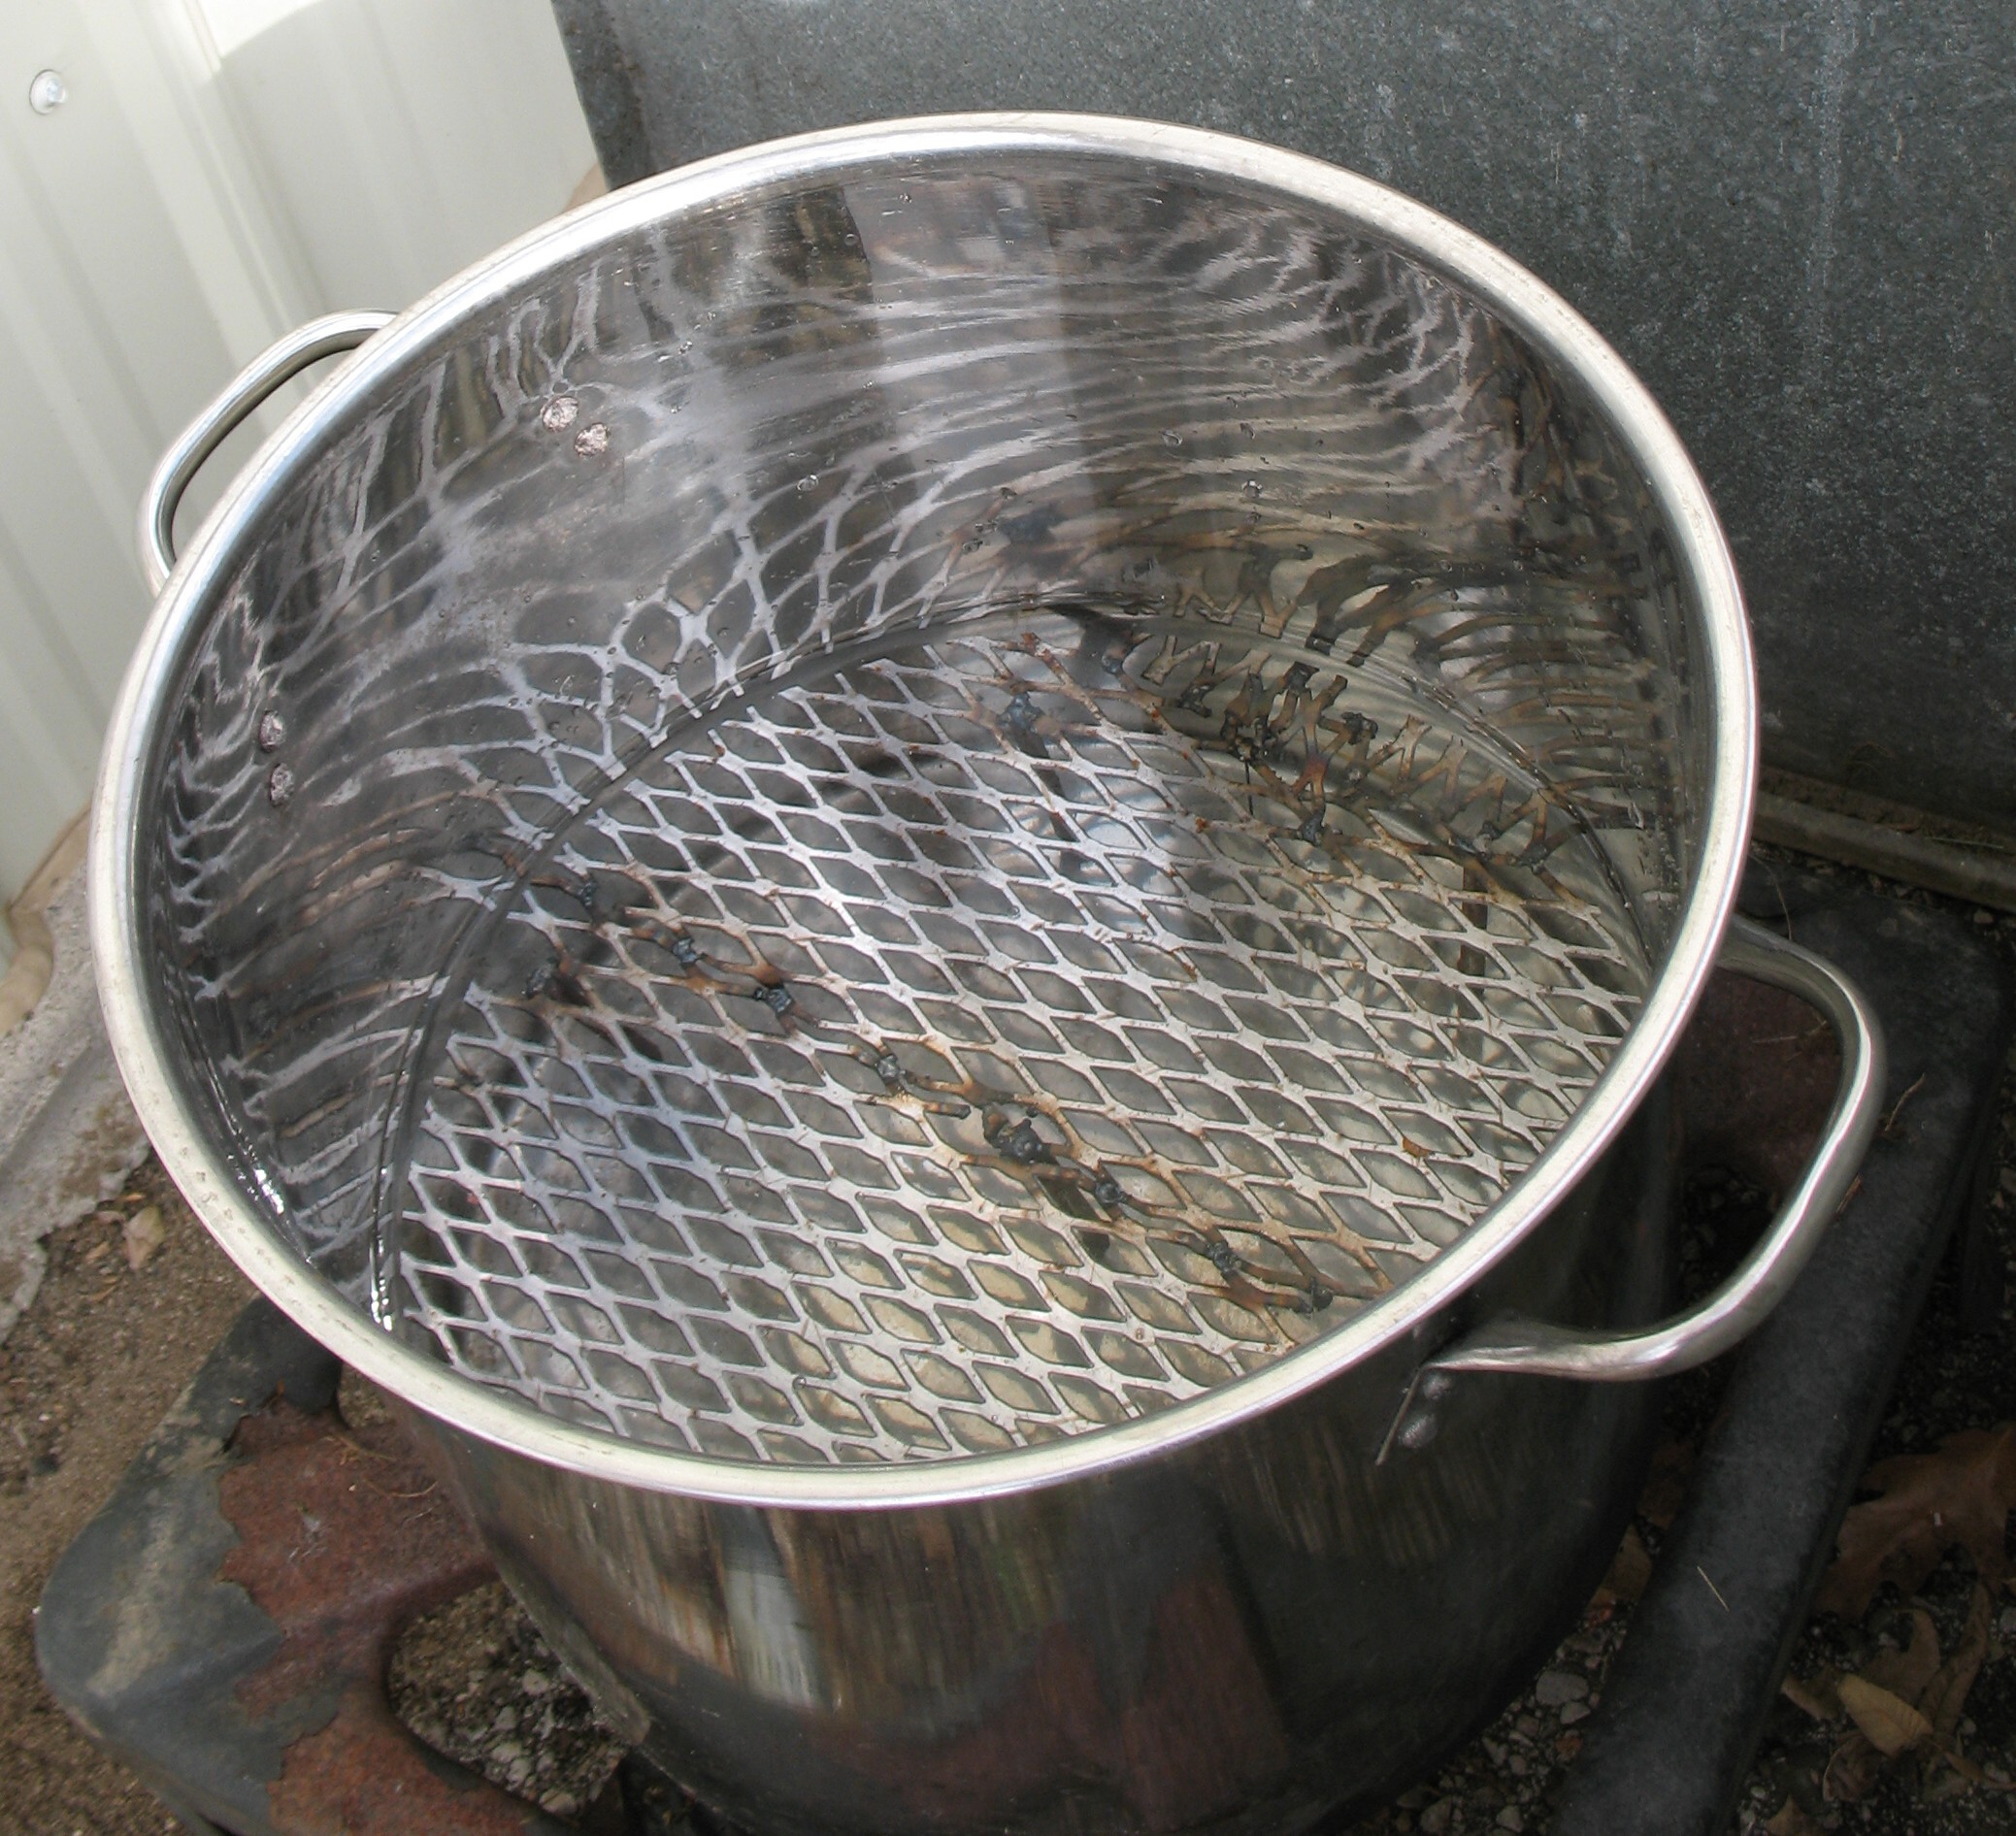
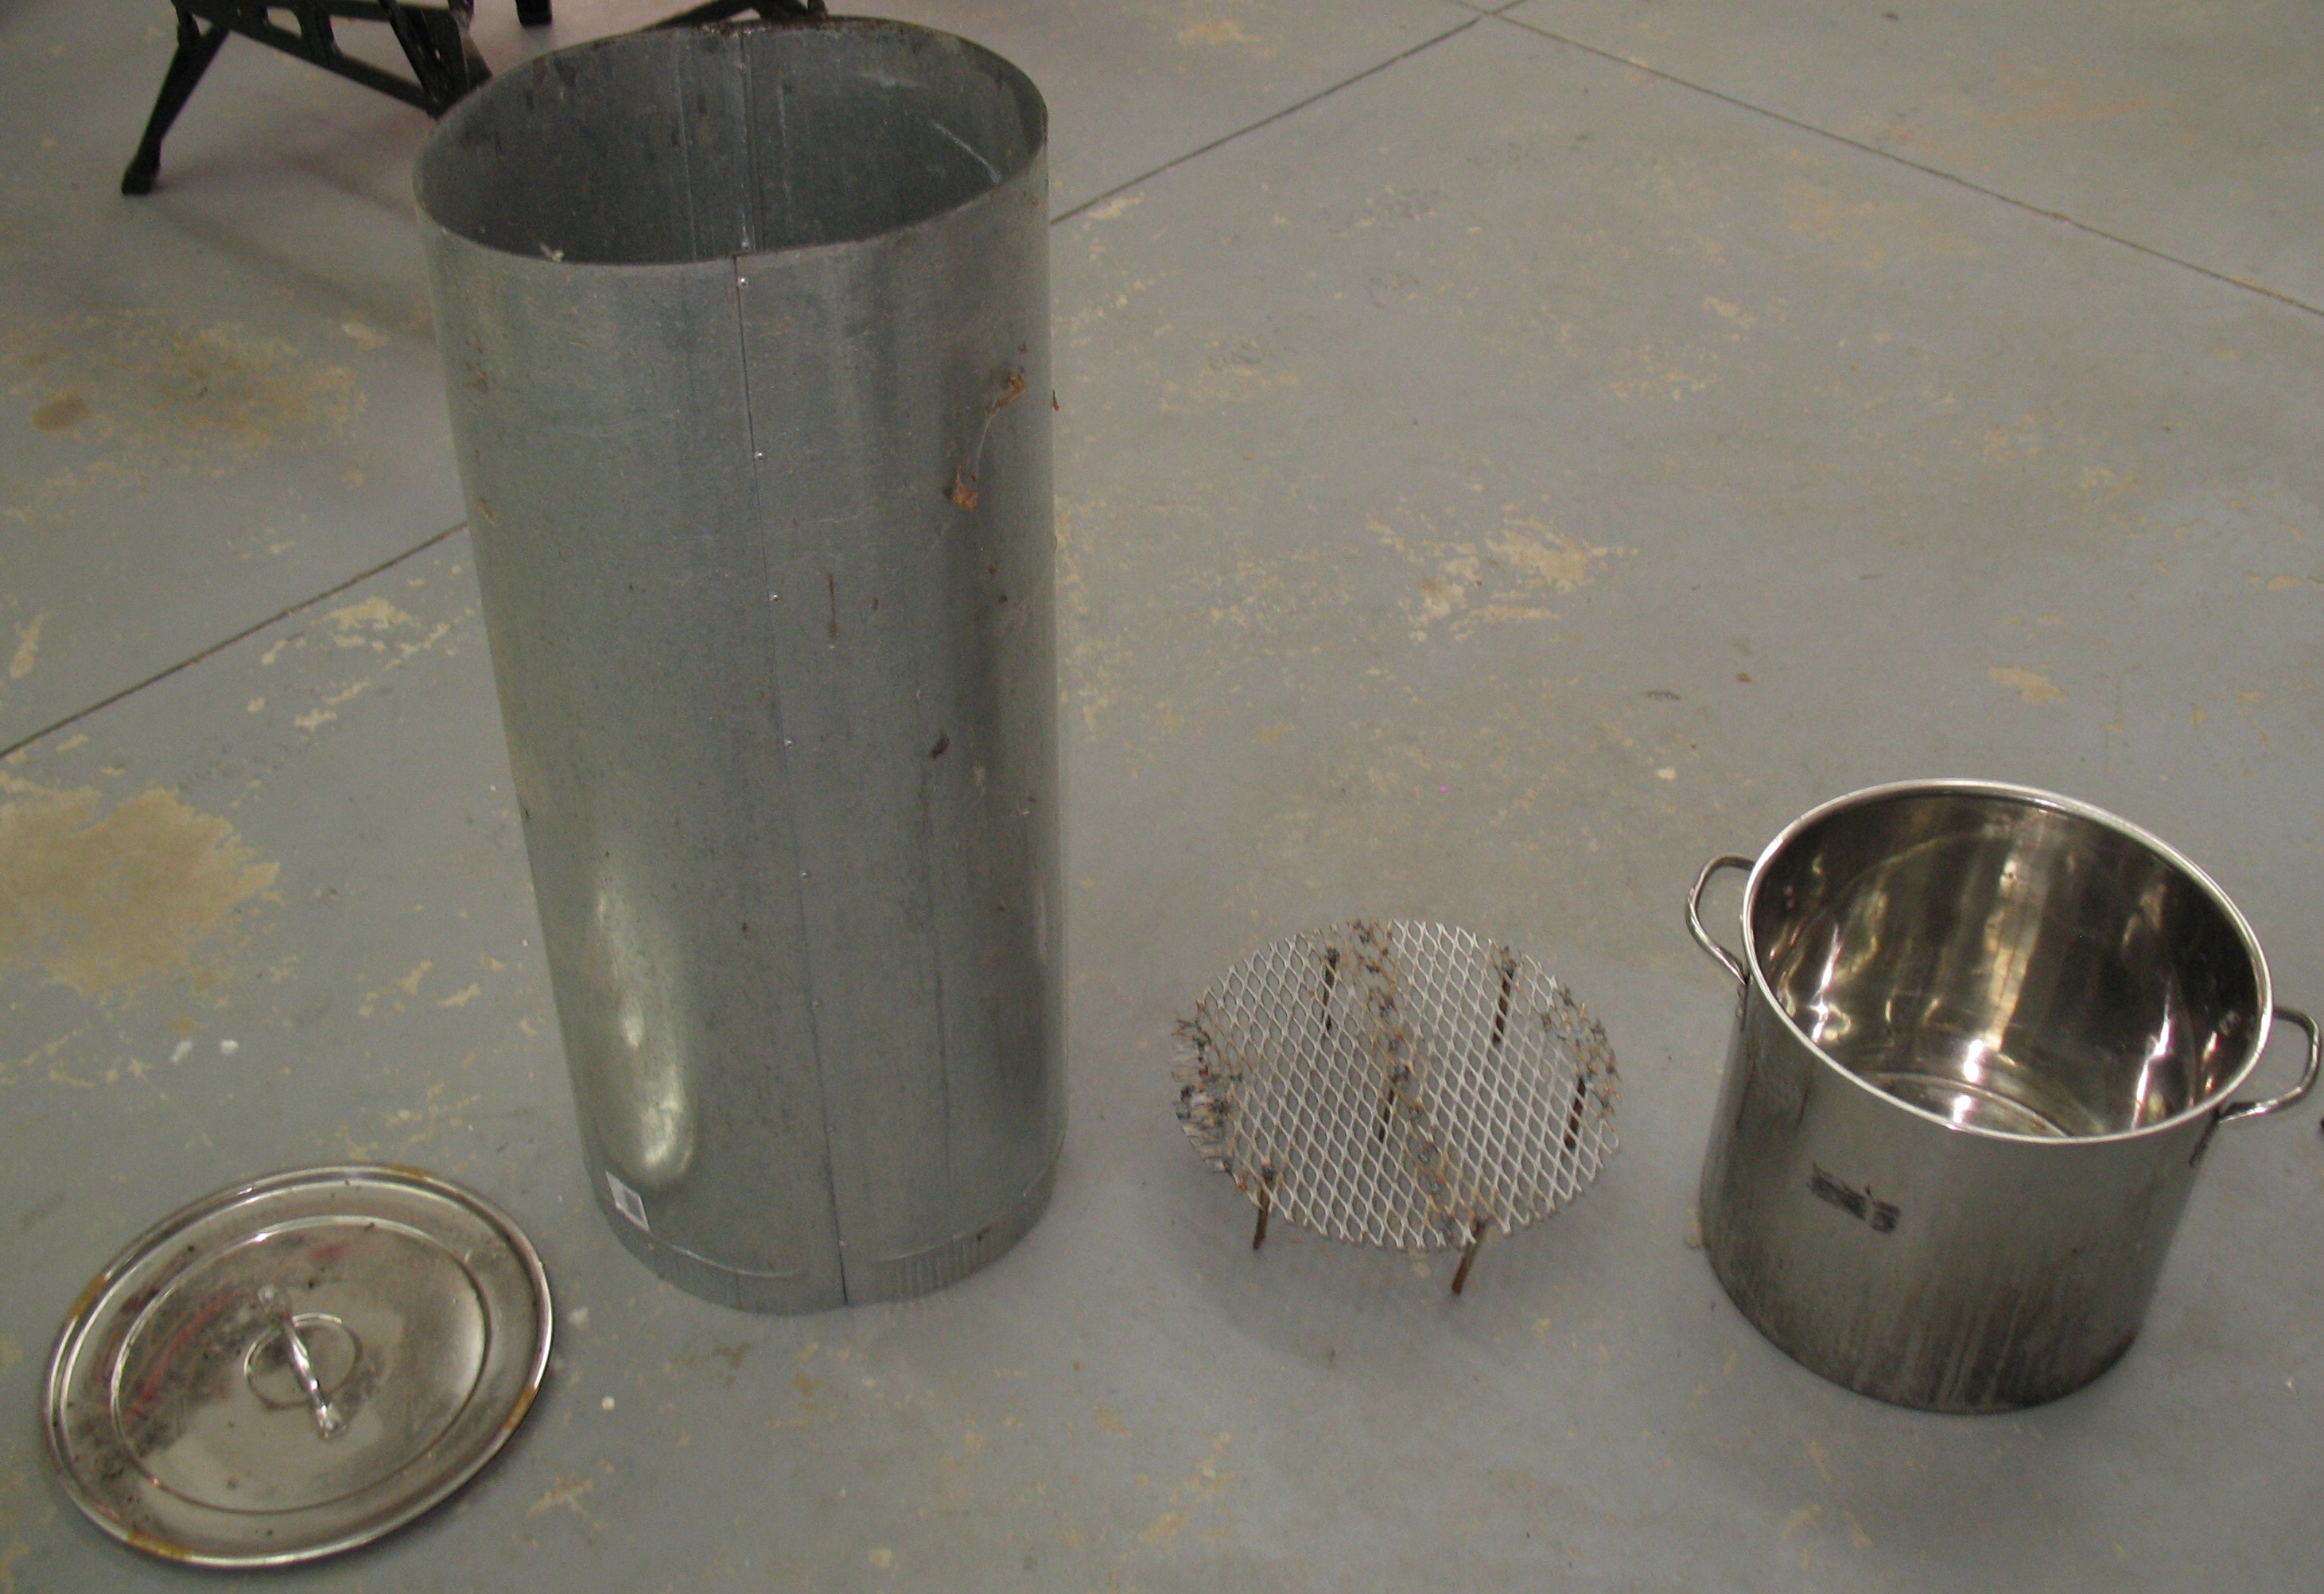 Our cooking pot was made up of a large stainless steel stock pot with lid, a grille on legs to keep the stems out of the water, and an extension pipe to make the pot tall enough for the stems.
I had made the grille the same morning by welding together some scraps of expanded steel mesh and round steel rod.
The extension pipe is made from two sections of 6″ round heating duct joined lengthwise to make a 12″ tube. Because of the geometry of the locking seams I had to add a few pop rivets to hold it together. This turned out to be a perfect fit in the pot.
The harvesting and stem preparation was pretty straightforward:
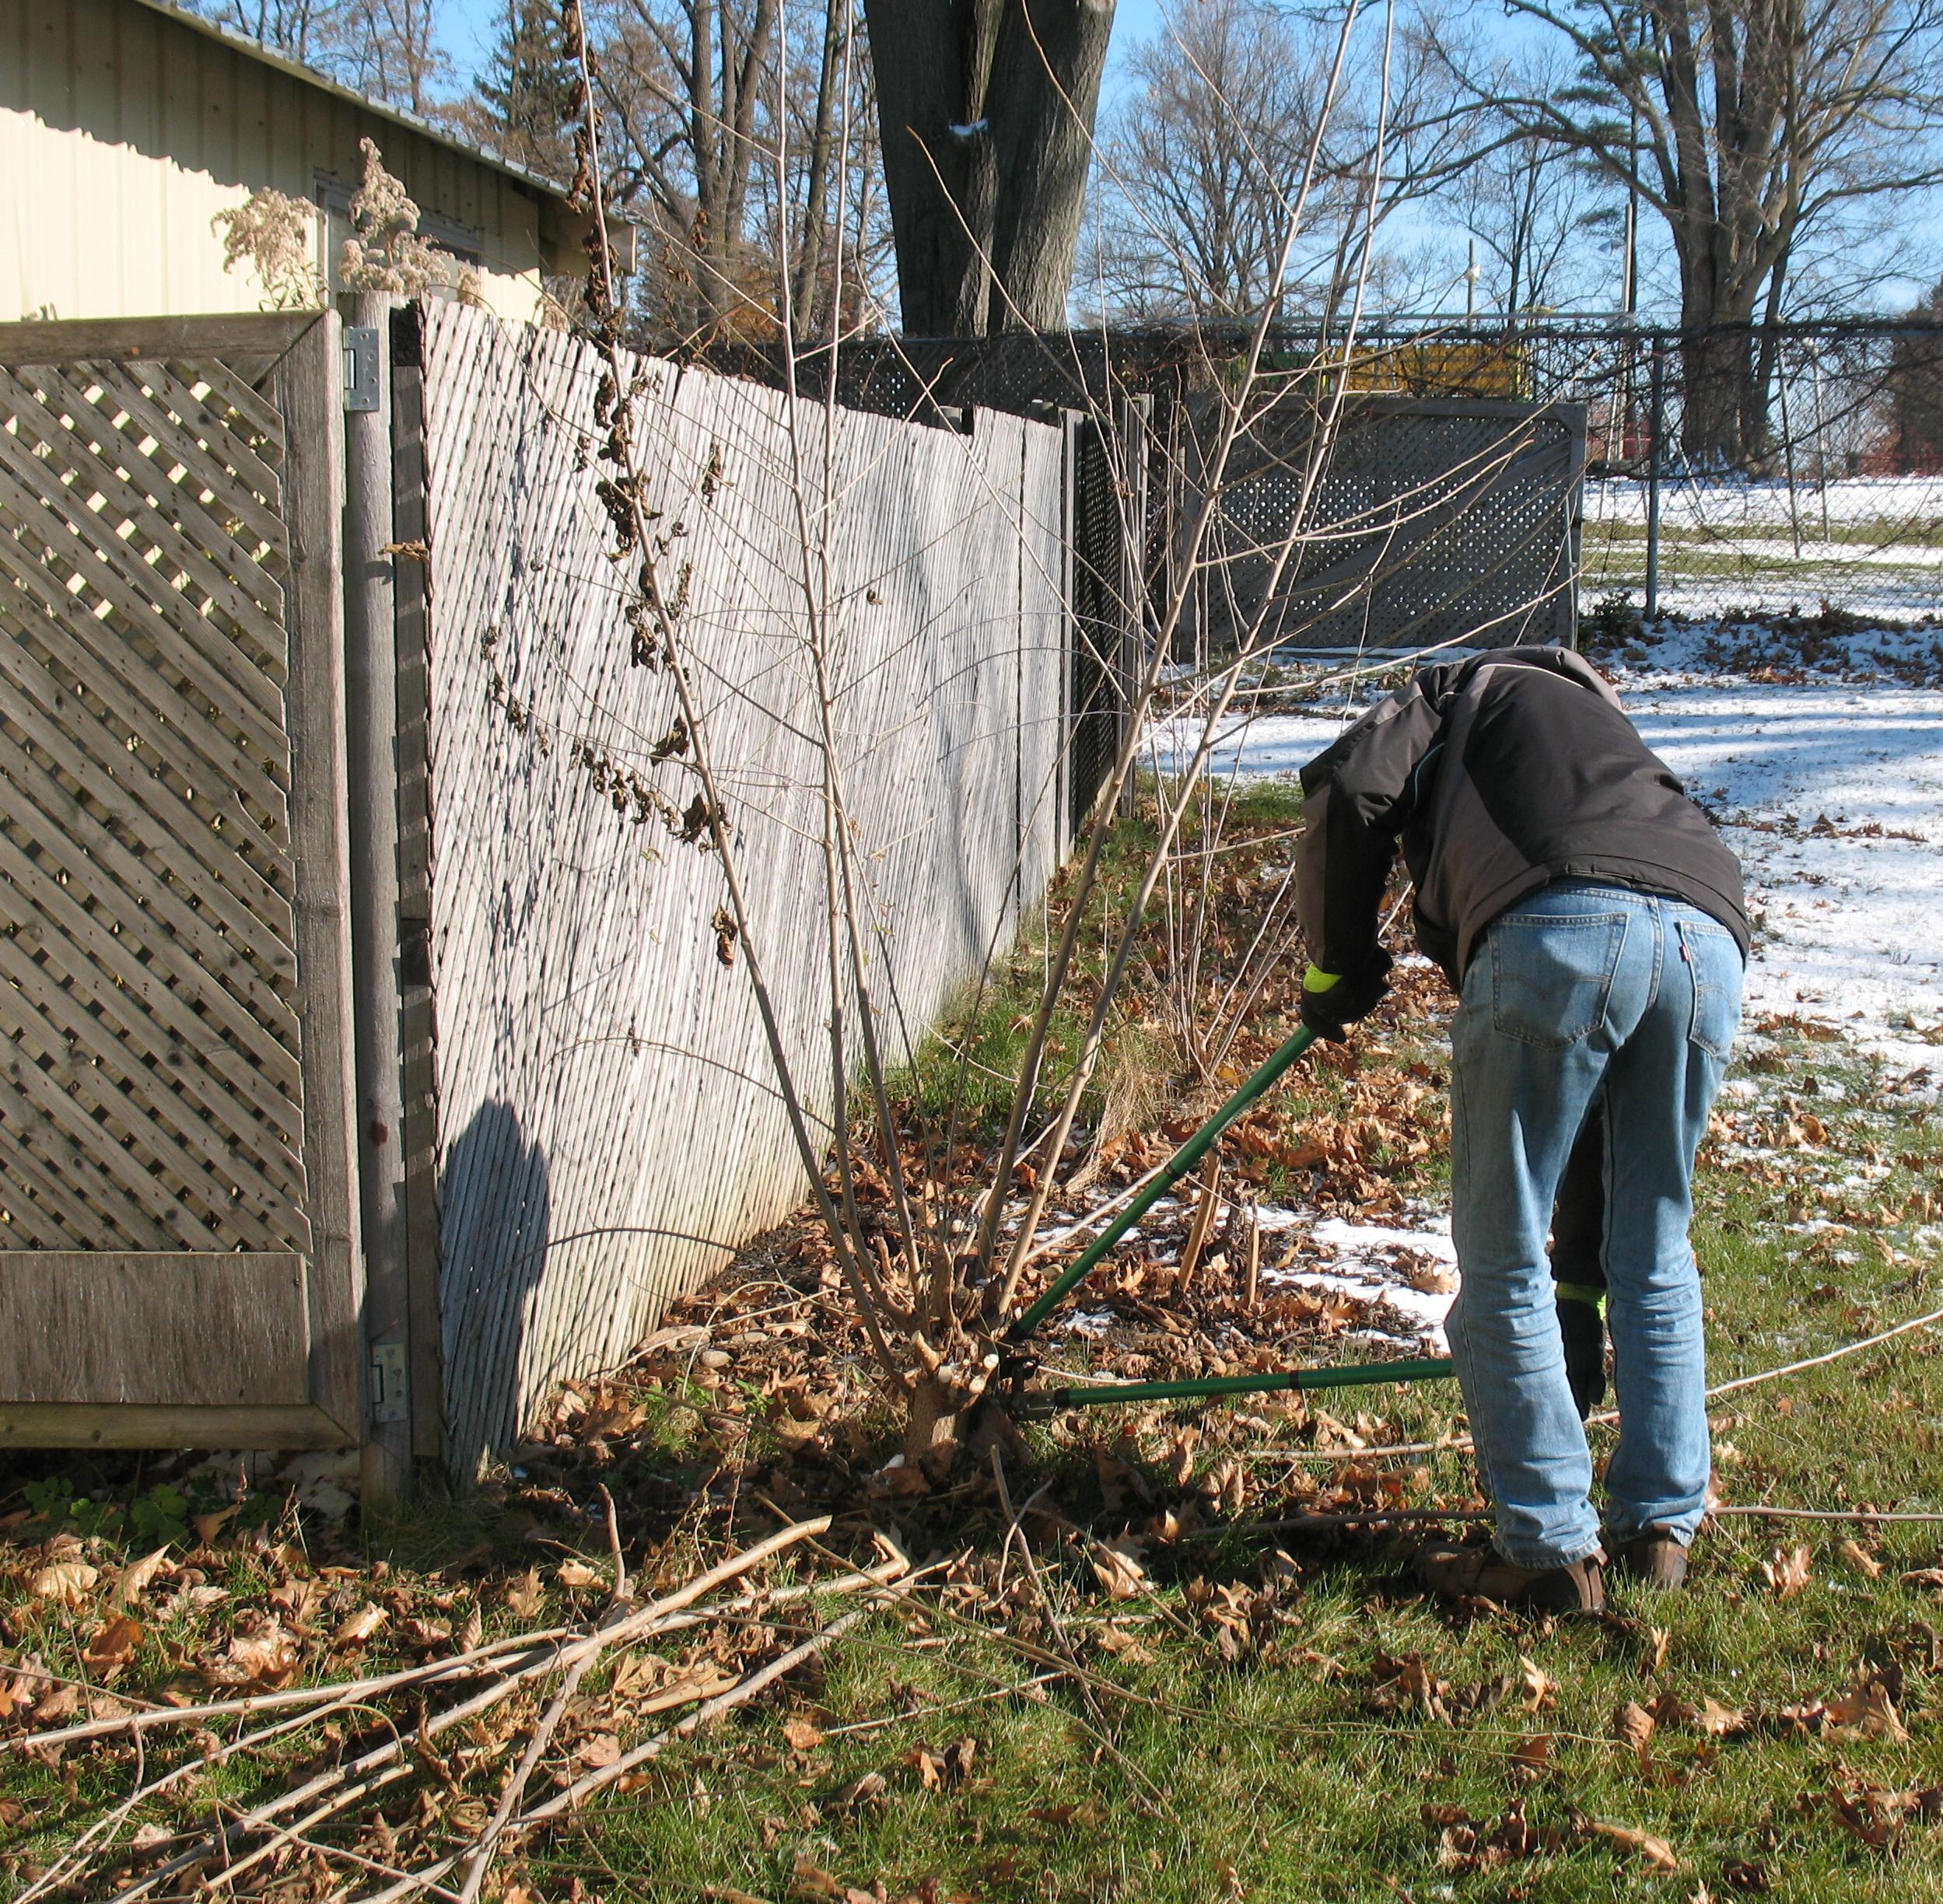
I used long-handle pruners to cut the stems off the plants. The stem that has leaves on it had died in the fall because an animal had eaten all the bark around its base.
The cut stems from both plants, ready for cooking prep.
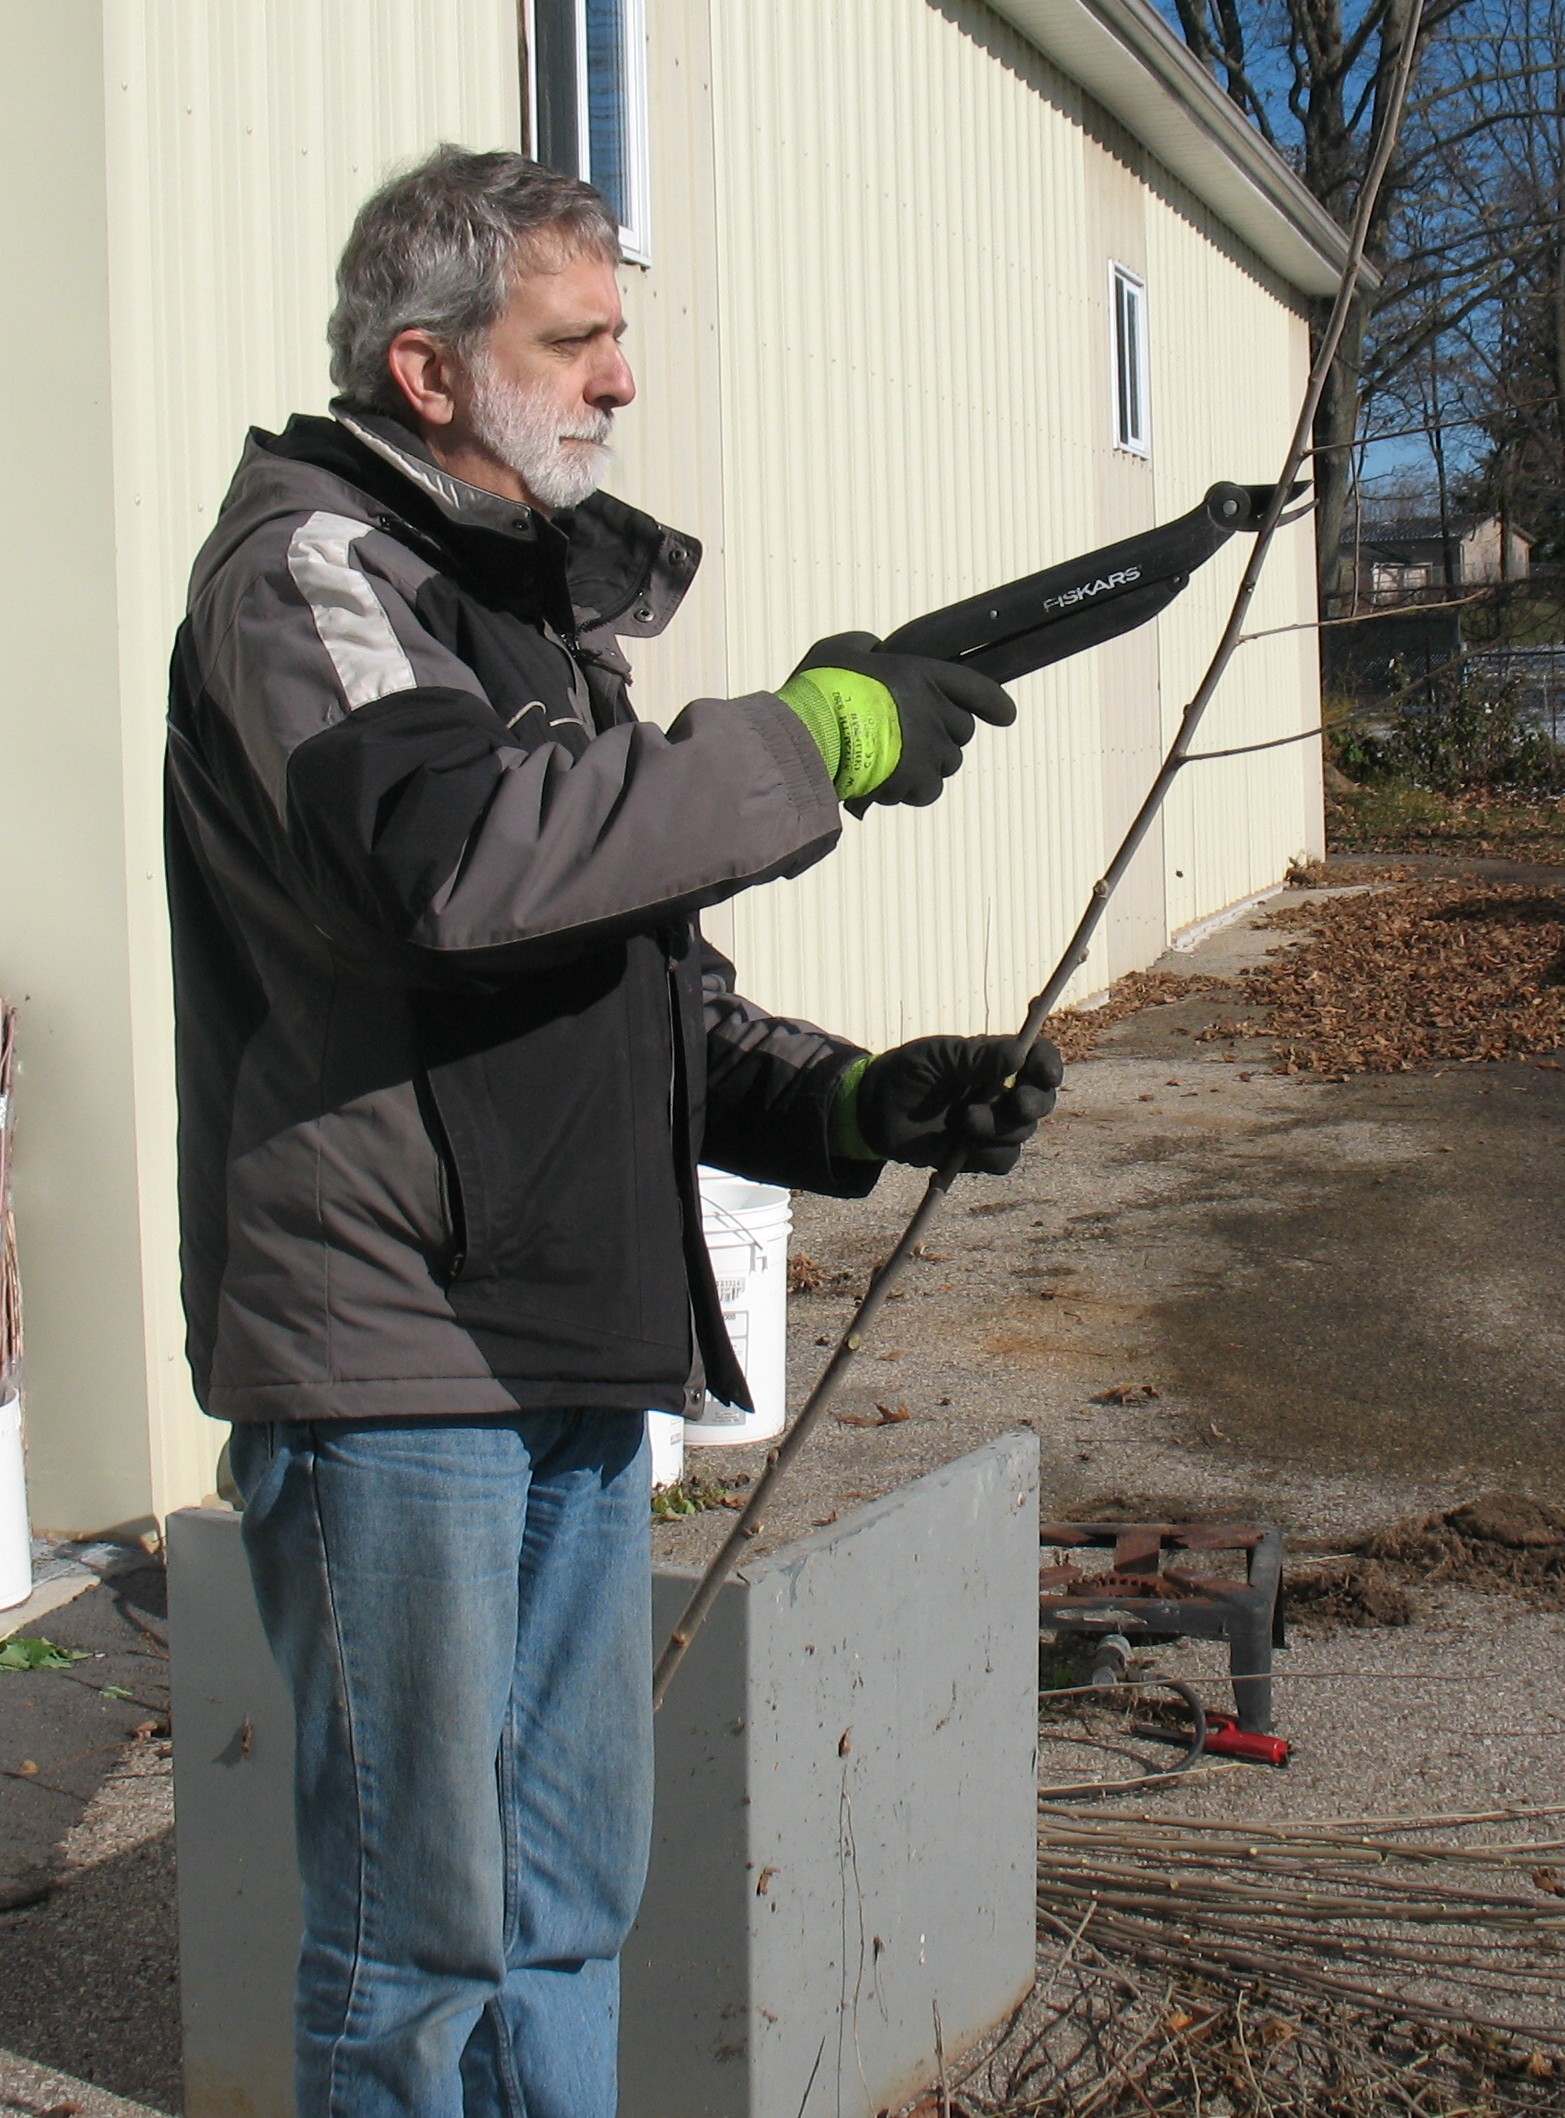
I’m using a smaller pair of pruners to trim all the side branches off the main stems. This will allow the stems to be bundled up to fit them in the steamer. Some of the larger side branches were also cooked.
Normally, I try to reduce the number of side branches by removing suckers through the growing season, but this year they got away from me.
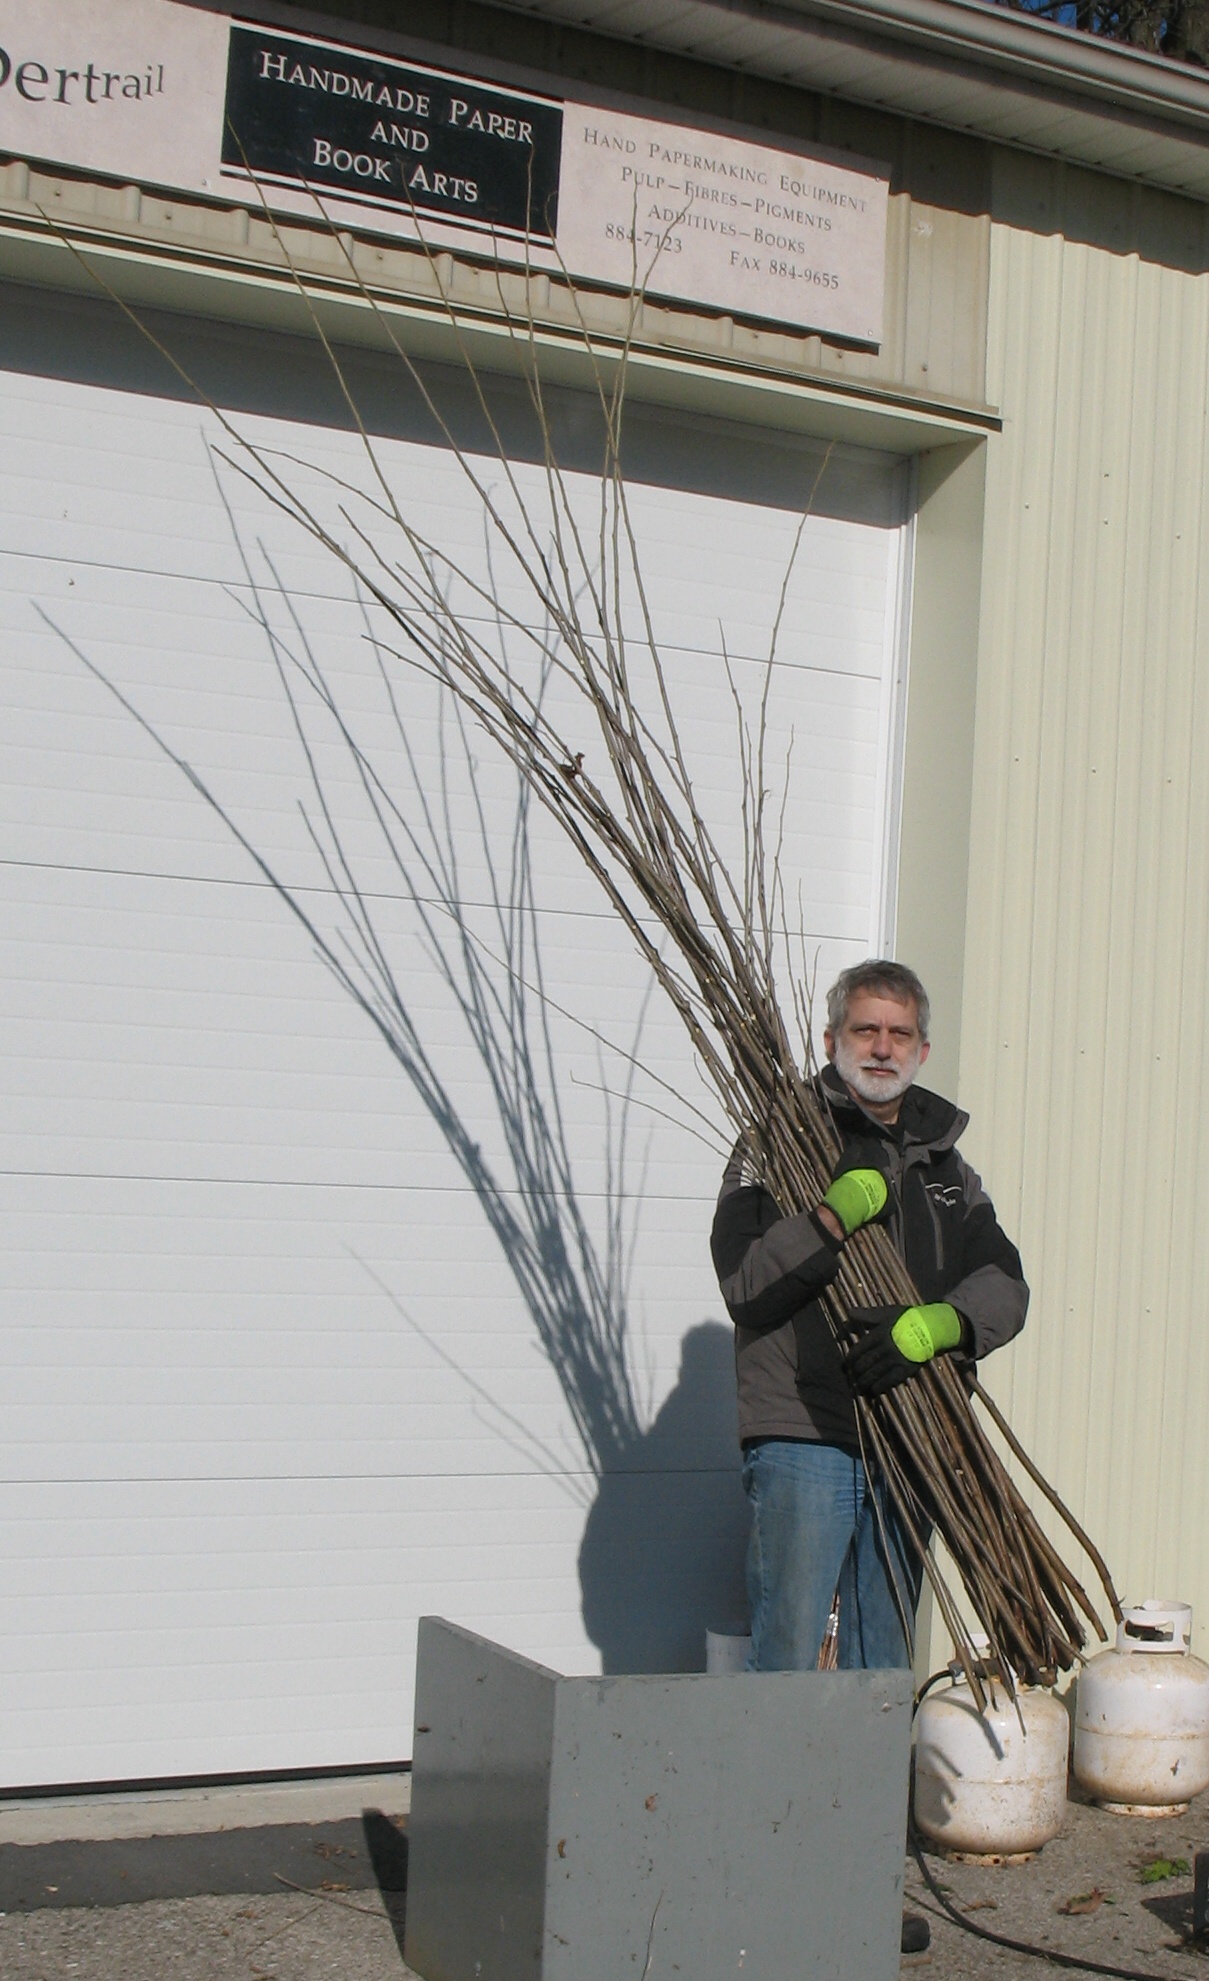
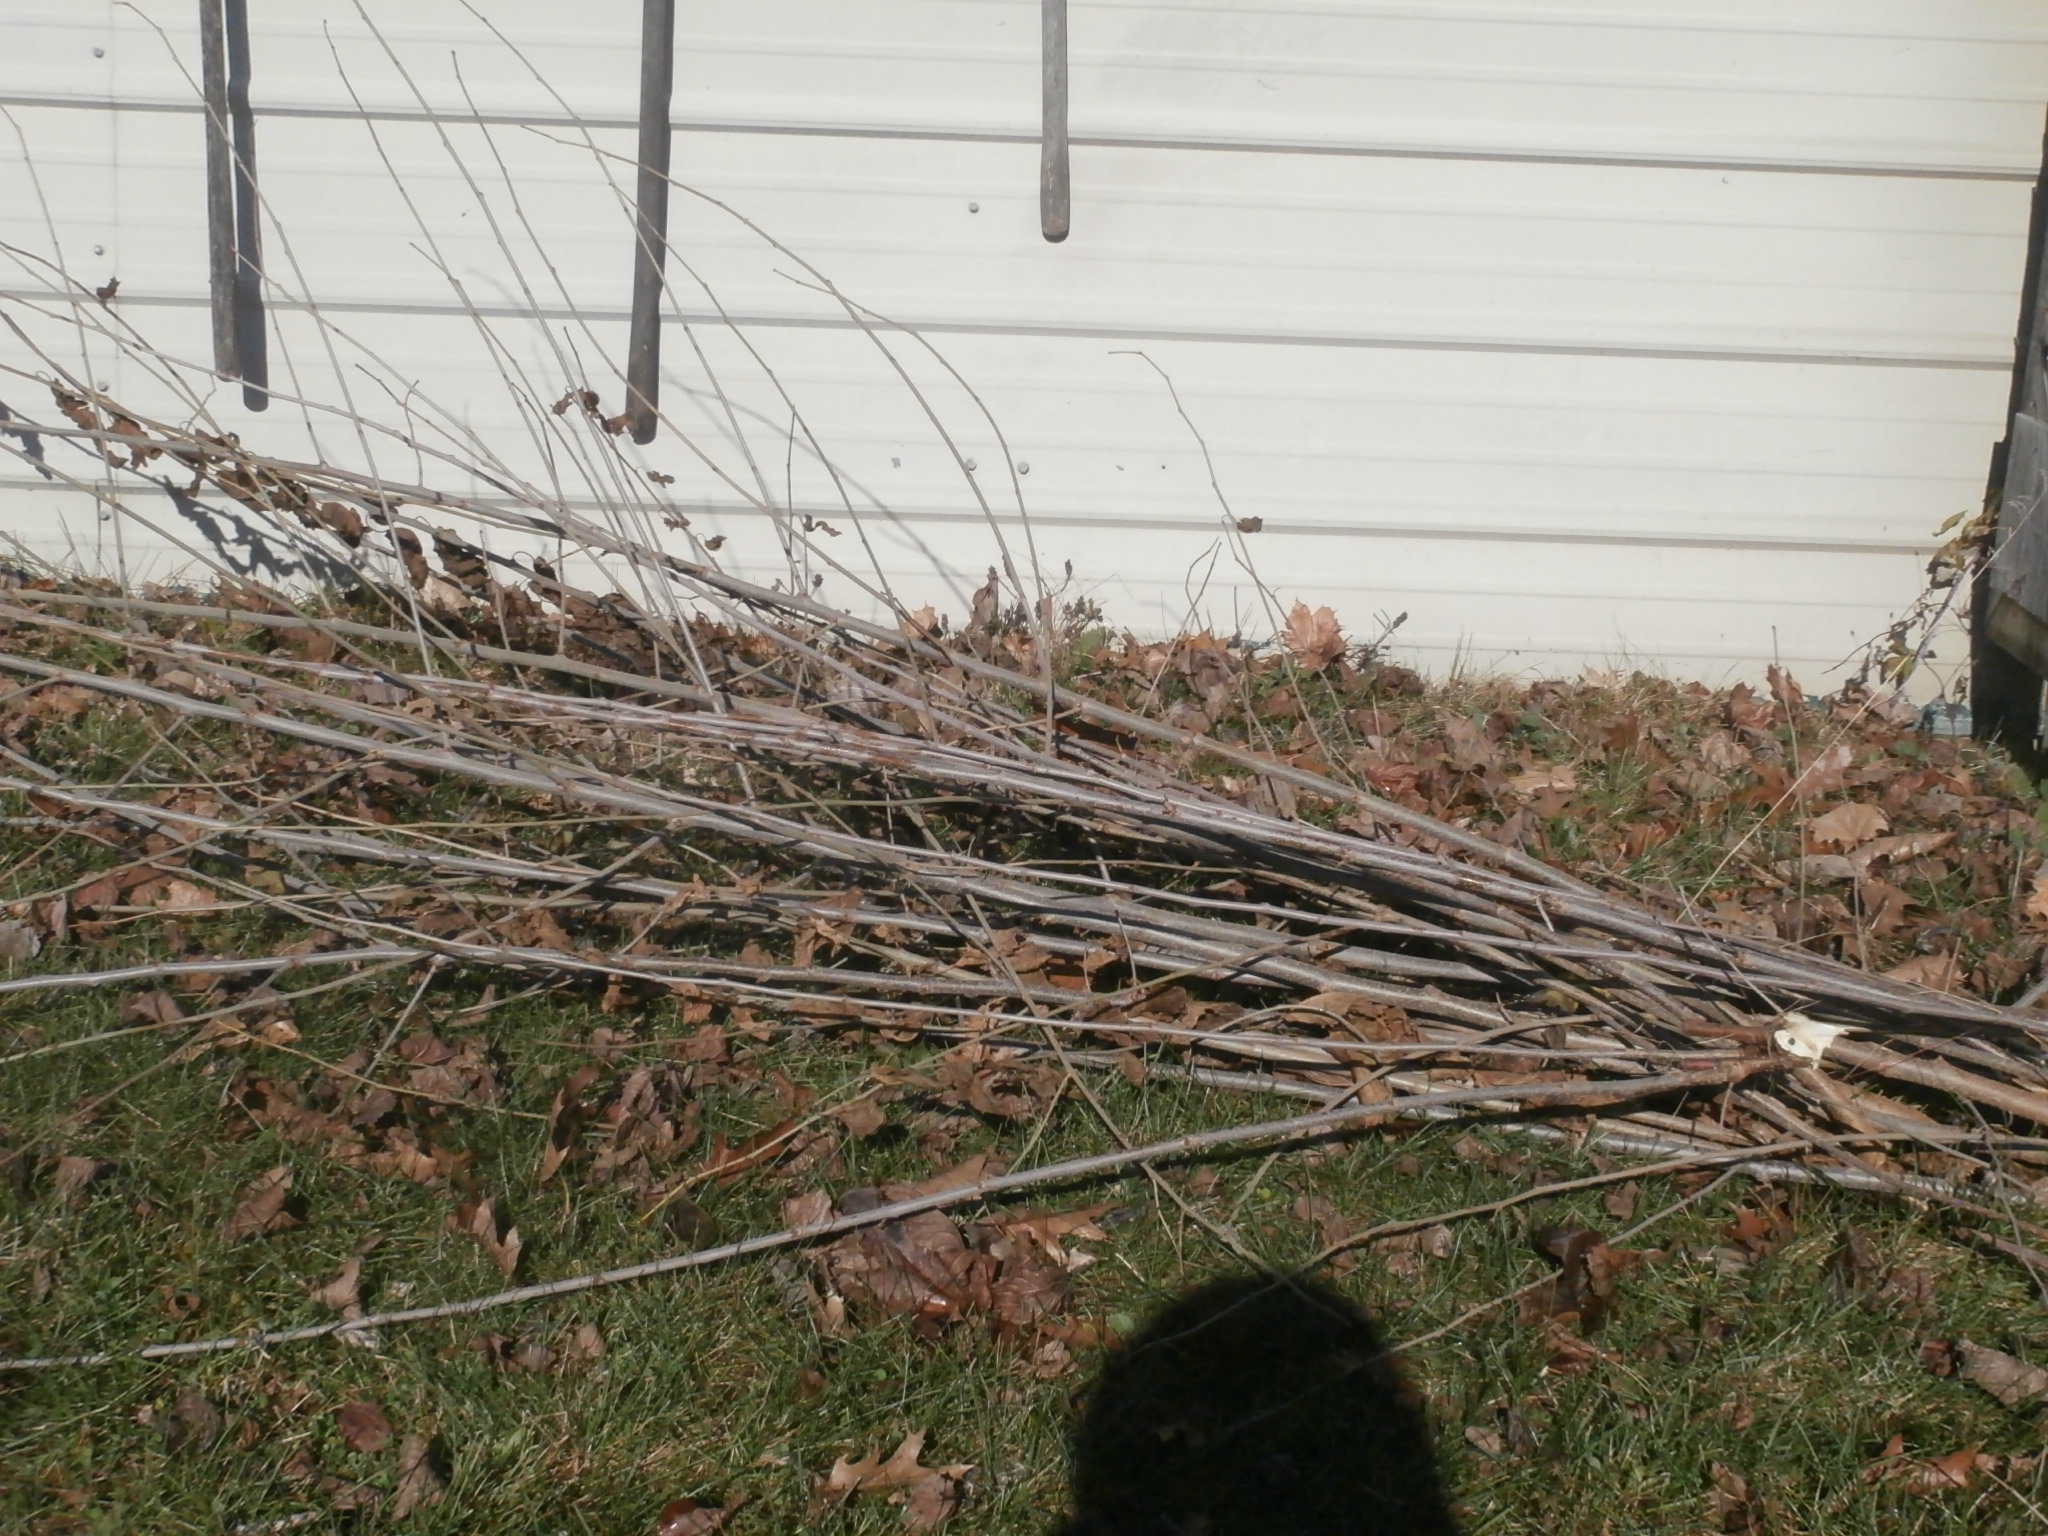
Here’s all of this year’s harvest, including both the stems just cut and also the stems that died earlier in the year.
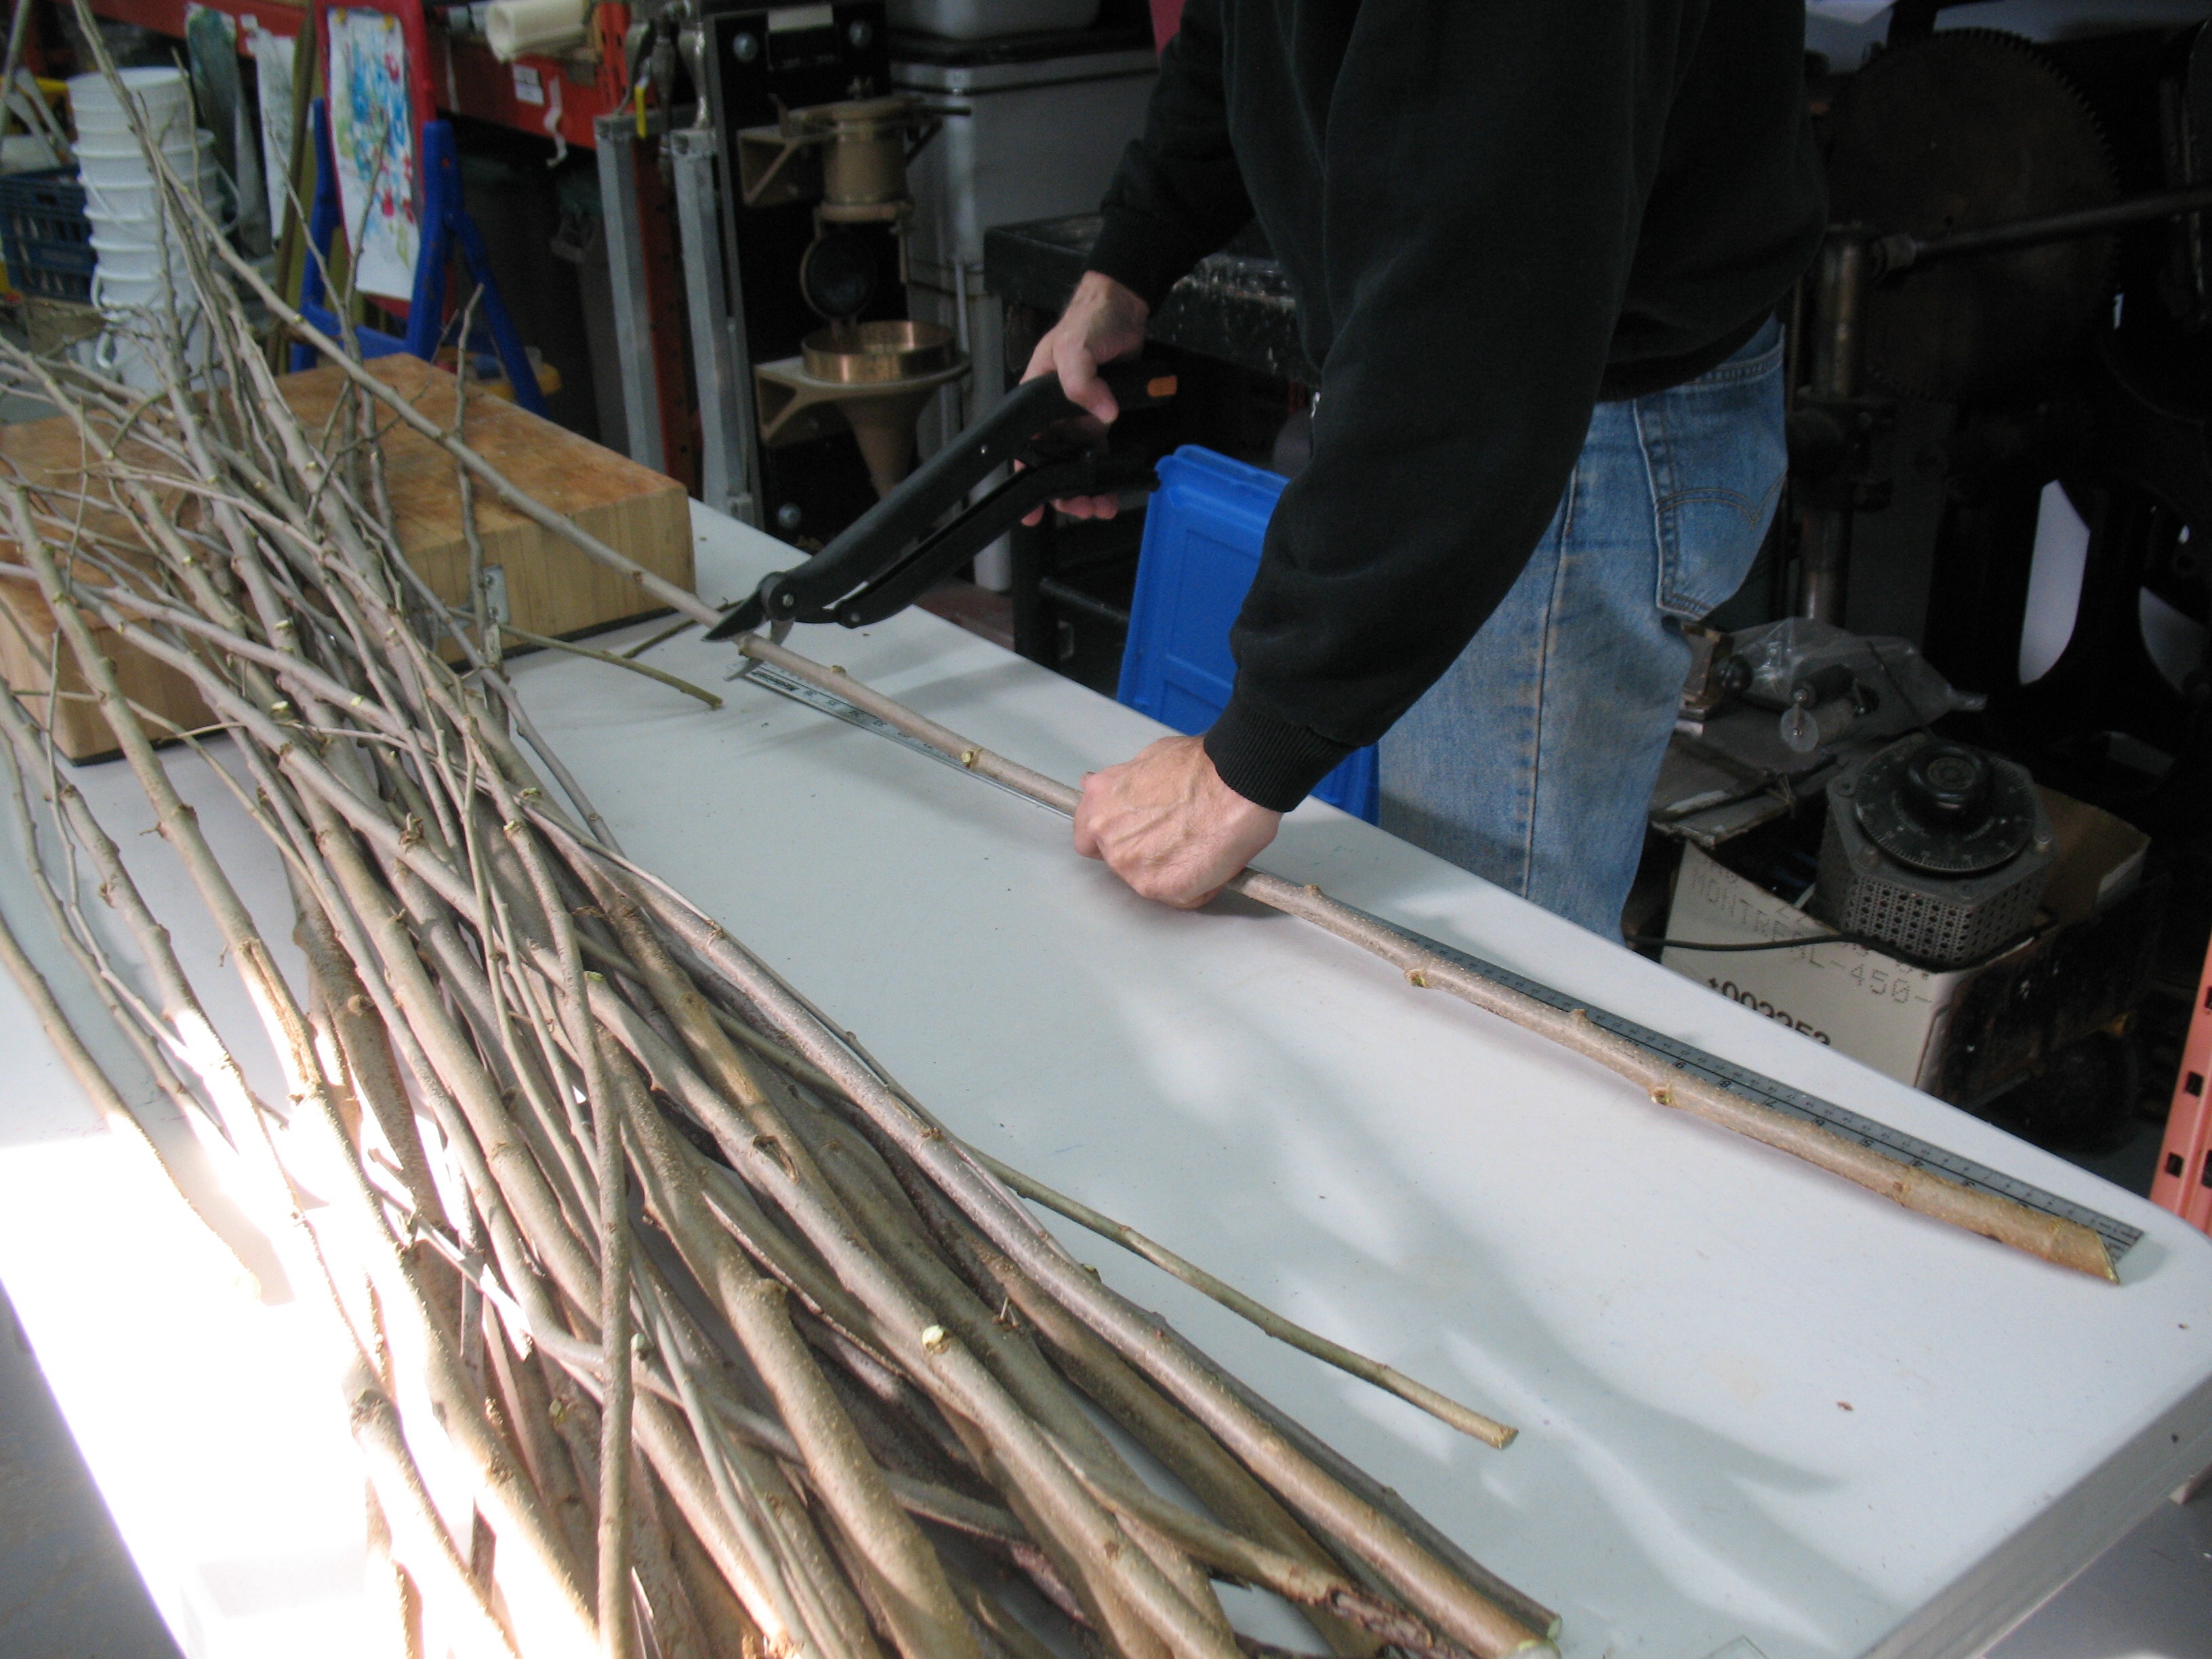
We moved inside to cut the stems to a length that would fit the steaming pot.

The stems to steam, from four different years (L-R): 2014 (4.9kg green), 2013 (2.45kg dry), 2012 (1.25kg dry) and unknown previous year (1kg dry). As it turned out the last bundle was not used because it did not fit into the pot.
The cooking setup included a propane cooking ring with a shield to keep the wind away. The pot was filled with tap water up to the level of the grille.

 I should have cut the stems a bit shorter. The extension pipe slid further into the cooking pot than I had expected, so the overall height of the pot was shorter than I had planned for. A bit of aluminum foil came to the rescue, though, making a cover that sealed well to keep the steam in.
We let the stems cook for a few hours, checking them occasionally to ensure the flame had not blown out and that there was enough water in the pot.
In the meantime we had lunch and did some yard work.
This is where things started to get a bit worrisome. Although the pot seemed to be cooking fine, with a steady stream of steam coming out from the edges of the foil lid, there did not seem to be much change in the appearance of the stems. After four hours of cooking the top ends of the stems did not appear substantially different than when they went in. Nevertheless I turned off the burner and took the bundles of stems into the workshop.
Once I had them in the shop and cut open the bundle, I tried peeling a few stems. They really didn’t seem to peel any easier than they did before cooking. You could start peeling a strip of bark, but the strip would become narrower and shallower (leaving the deeper bark layers on the stem) until it broke off.
The only places that seemed affected by the cooking were the very bottoms of the stems, where they might have been in, or at least splashed by, the boiling water.
Altogether, the whole effort appears to be an unqualified failure. I’m left to consider what might have gone wrong:
- Mulberry and kozo are not the same plant; the chemicals that bind the bark to the stem are different enough that steaming loosens the bark on one and not the other.
- Four hours is not enough steaming time.
- Despite appearances, the steamer was not developing full heat inside. All the applied heat was being lost with steam condensing on the walls of the pot and the steam never displaced all the air out of the pot.
- I need to cut the stems shorter, or modify the pot extension so it does not slide so far into the pot.
There isn’t much I could do about the first problem, except to replace my mulberry plants with true kozo. The observation about the bases of the stems being cooked suggests that I should try boiling the stems rather than steaming them. I will probably try cutting some of the stems shorter to fit the pot and boiling them in the next few weeks.
If the third issue is the problem, I could add some sort of insulation blanket to the sides of the pot. It would have to be a fireproof material because of exposure to the burner flames near the bottom. A welding blanket might do the trick. It retrospect, I have an infrared thermometer that I could have used to measure the side temperature of the pot to see if heat loss is a problem.
Really interesting story about steaming mulberry. Just thinking, if you turned the bunches of stems upside down halfway through cooking may facilitate cooking?
Fire retardant blanket to insulate the cooking chimney? Or a double skinned chimney?
Sounds like good fun, to experiment anyway. cheers, an Aussie papermaker wishing to be back in lovely cold Canada…
I have some fire retardant blankets that I plan to use when I try to re-steam the same stems some time in the future. These are sold as welding blankets and aren’t particularly expensive. They turn out to be useful with the hot metal equipment as well to get faster melting and less oxidation of the type metal.