
After doing some R&R on one of my Monotype composition moulds I found that when installed on the caster, the type carrier could not reach into the mould without rubbing on the face of the left type block. One of the assembly steps for this style of mould does not have any reference points to replace a part in the exact location required.
I set out to measure all my moulds to determine what the correct distance is between the faces of the left and right type blocks and the read edge of the mould’s base plate. For the 3E style moulds I also measured from the faces of the type blocks to the rear of the squaring plate to see if that was consistent from one mould to another. If it were, a simple spacer could be used to properly install the squaring block in the right position.
The first measurement is an awkward one to make because the two faces are not back-to-back. I eventually found that a metal angle clamped to a flat surface could be used to do this. The back edge of the mould base would be held against the edge of the angle, then measurements taken from the upright leg of the angle to the face of the type block. I used a piece of 2″ aluminum angle bar, so my measurements were 2″ greater than the actual distance I wanted to measure.
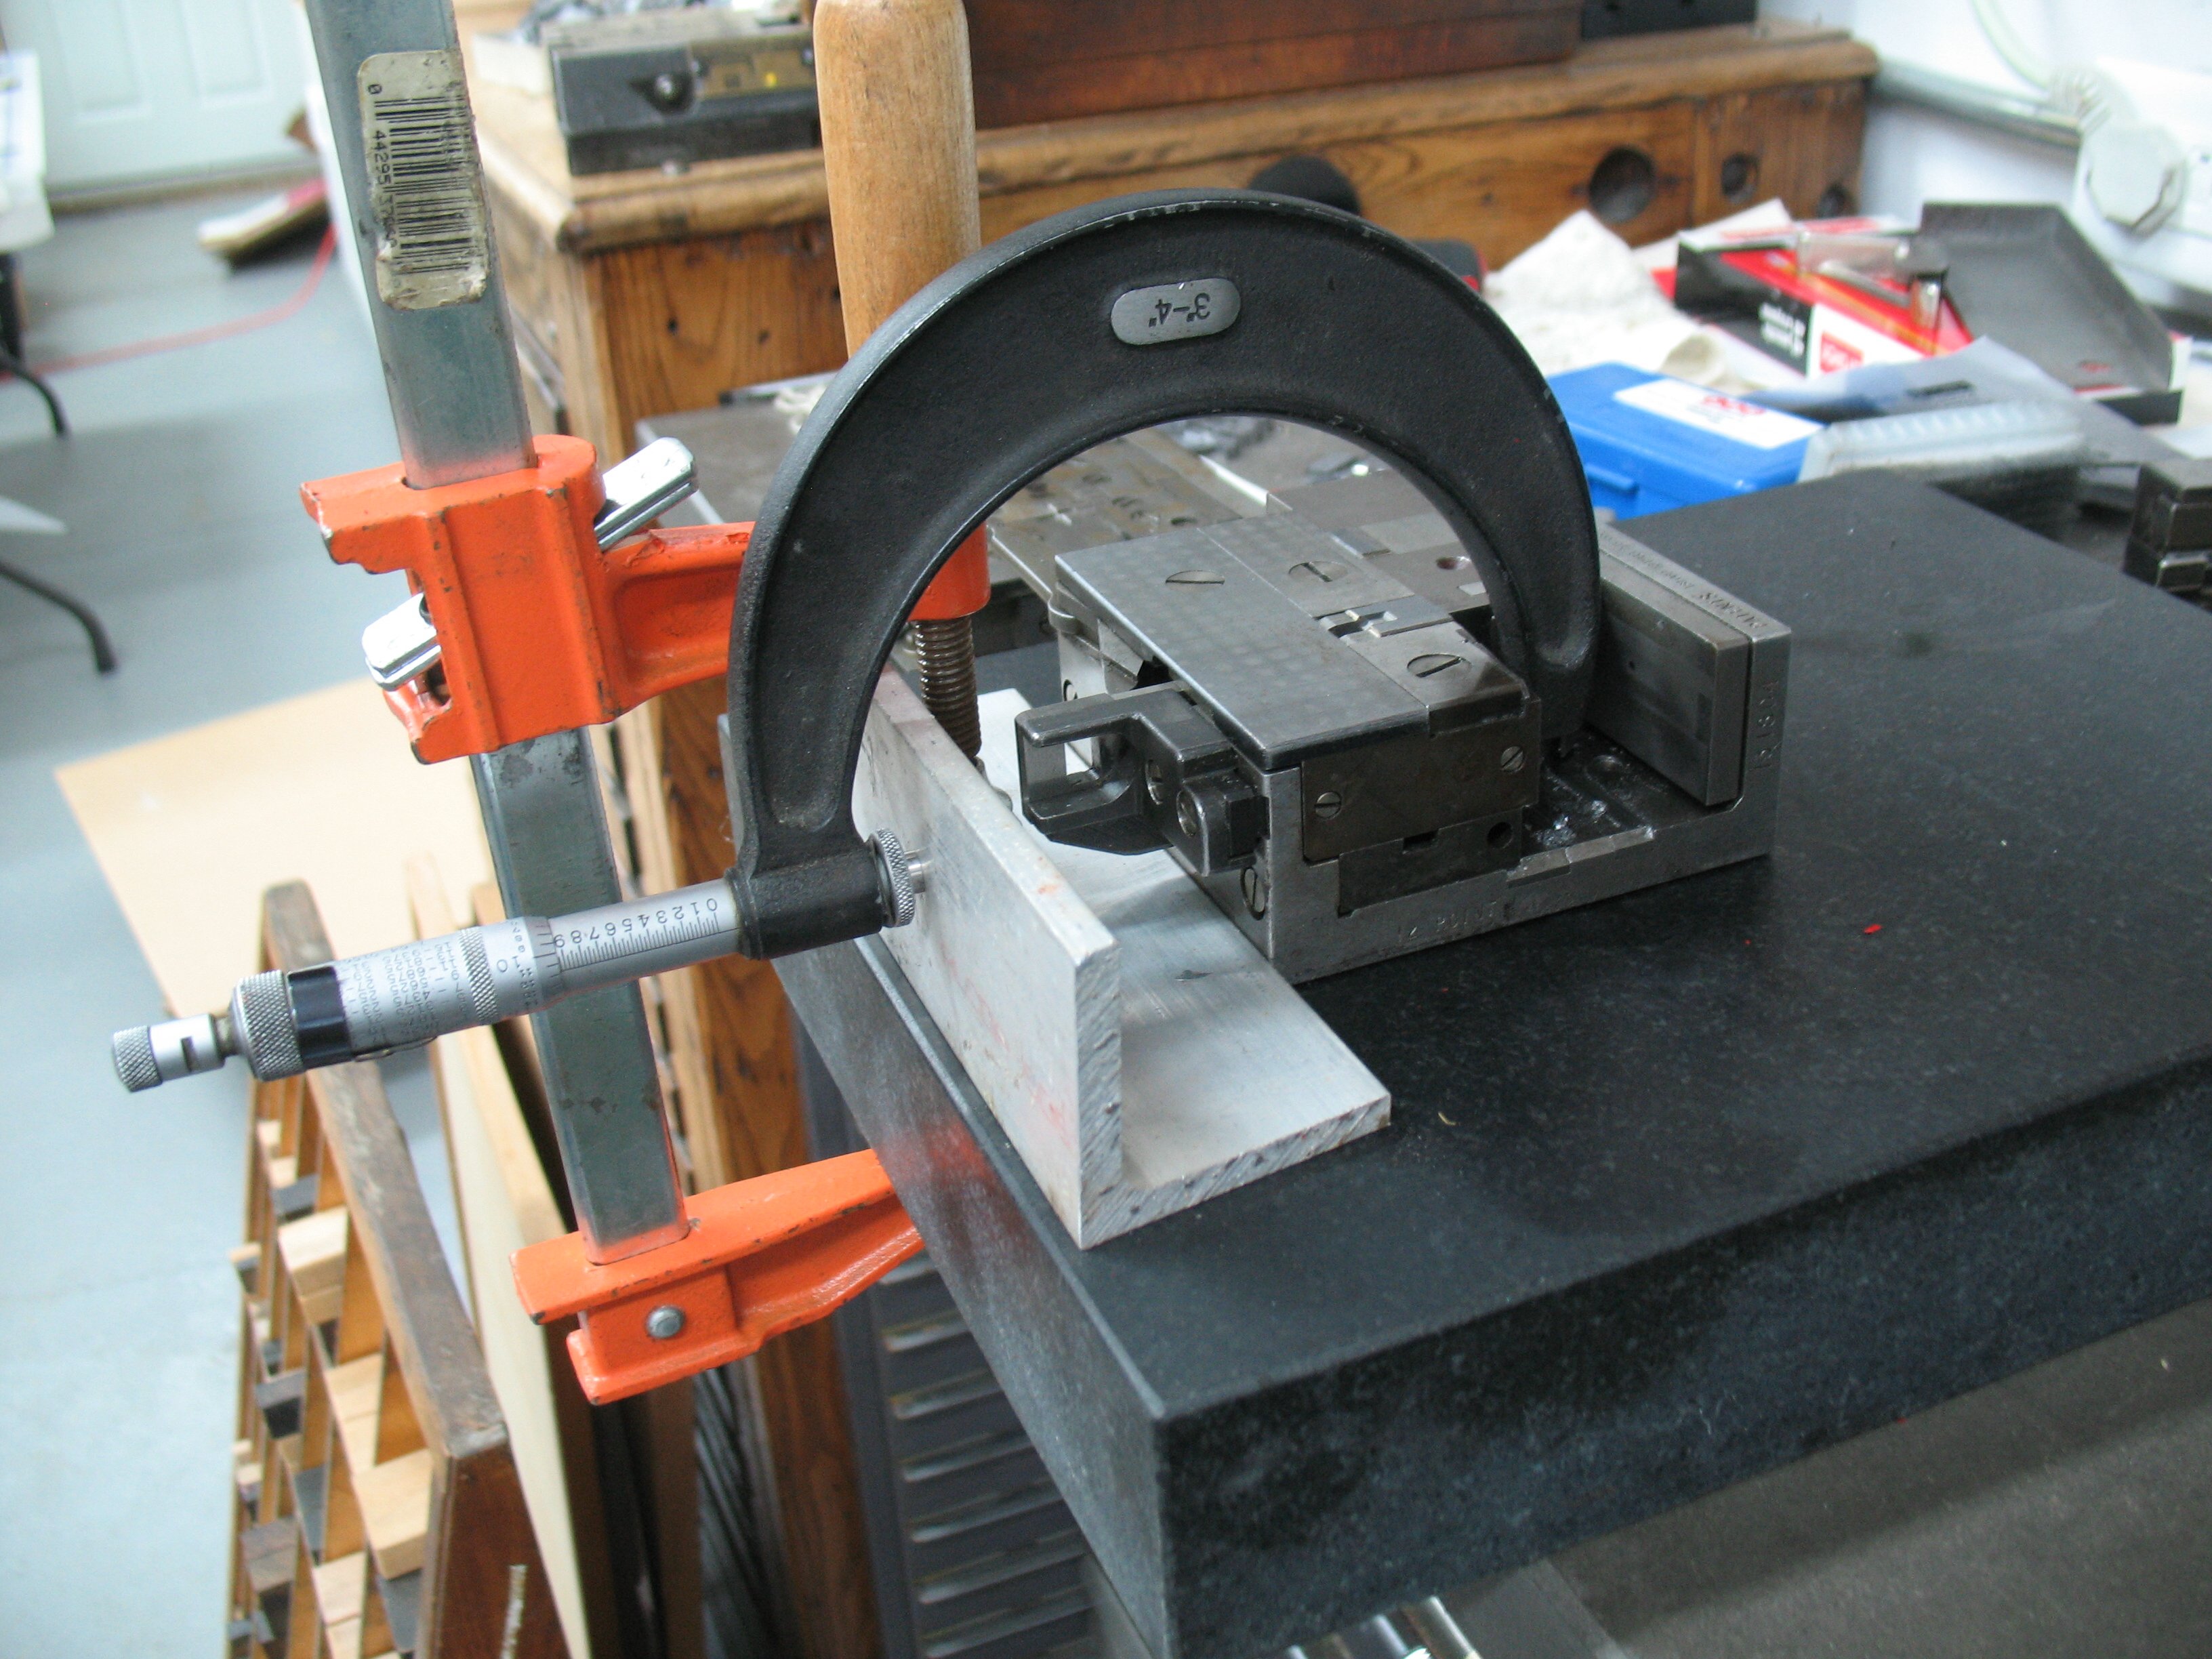
Measurement on an English composition mould using a 4″ micrometer.
The distance I found was pretty consistent across the six moulds I measured: the average was 1.940″ and the maximum was 1.946″ whereas I found the distance to be around 1.96″ when I measured the refurbished mould.
I loosened the screws on the underside of this mould (5 holding the squaring plate and 5 more holding the type blocks) so the inner assembly could move around. The type blocks were still held to the squaring plate by 5 other screws in the ends and back. I set two of the screws to provide just a bit of friction, placed the mould in my measuring setup and tapped the parts until they showed an acceptable distance. Then I tightened all the screws again and made a final measurement of 1.938 inches, a bit low, but within the range of my other moulds.
I reinstalled the mould on my caster, and now the type carrier moved freely. I used a feeler gauge to measure how much clearance the type carrier had, and the result was 0.013″ which would imply a maximum distance of 1.951 inches would be acceptable.
The other distance of interest, from the face of the type blocks to the rear of the bosses on the squaring plate, at least initially seems disappointingly inconsistent and so not useful as a reference for mould reassembly. One problem though is that I was making these measurements on assembled moulds and this makes accurate measurement difficult. As well, the rear surface behind the right type block may not be precision machined but the surface behind the left type block is precisely machined, so I will have to take a closer look at this idea next time I take a mould apart.
I also did a check for water flow through the mould and that is still insufficient, as it is only a drop or two per second. I will have to take the mould off again and try blasting fluid through the cooling passages to try to clear out any blockages.
I once had a mould with a completely blocked water channel, this was cleaned by a friend of mine, he used phosphoric acid, to dissolve all debris inside the channels, this appeared to be a mix of calcium-carbonates and also oil…
….
Sealing the waterchannels under the side blocks, can be done with a minimum of heat resistent silicon-paste. This paste is meant for sealing motor-blocks in cars.
only a very tiny ammount is added with a fingertip…
since I’ve started with this, I did not encounter anymore a leaking mould.
…..
Once I had some troubles with the water drain, here I was able to clean the pipes with a strong solution of sodium hydroxide (NaOH 10%)
At present I use a mixture of cooling fluid for motorcars and water to cool the mould. This is pumped around, trhough a cooling machine, that once was used to cool a Ludlow machine. The cooling fluid and pumping around also minimizes the debris of Calcium carbonate in the channels inside the mould.
John,
Thanks for the tips. One thing that is great for removing lime (calcium carbonate) is citric acid. Not only does the acidity break down the carbonate, but the citrate tends to hang on to the calcium rendering it easily soluble. For small jobs lemon juice has enough citric acid.
The water channel sealant you mention sounds like sodium silicate. I found it in liquid form at a local pottery supplier. I wanted it for other purposes so I haven’t tried fixing a leaky mould with it. You would indeed have to be very sparing in use of any paste form to avoid putting the type blocks out of alignment.