
While trying to do some composition casting last weekend I found that an internal part of my type carrier was broken, so I had to give this part a quick servicing.
There aren’t actually that many internal parts to deal with, but they go together in a non-obvious manner and if you were not paying careful attention during disassembly you’ll spend forever putting the carrier back together again.
So here is a step-by-step disassembly of the type clamp and type support spring.
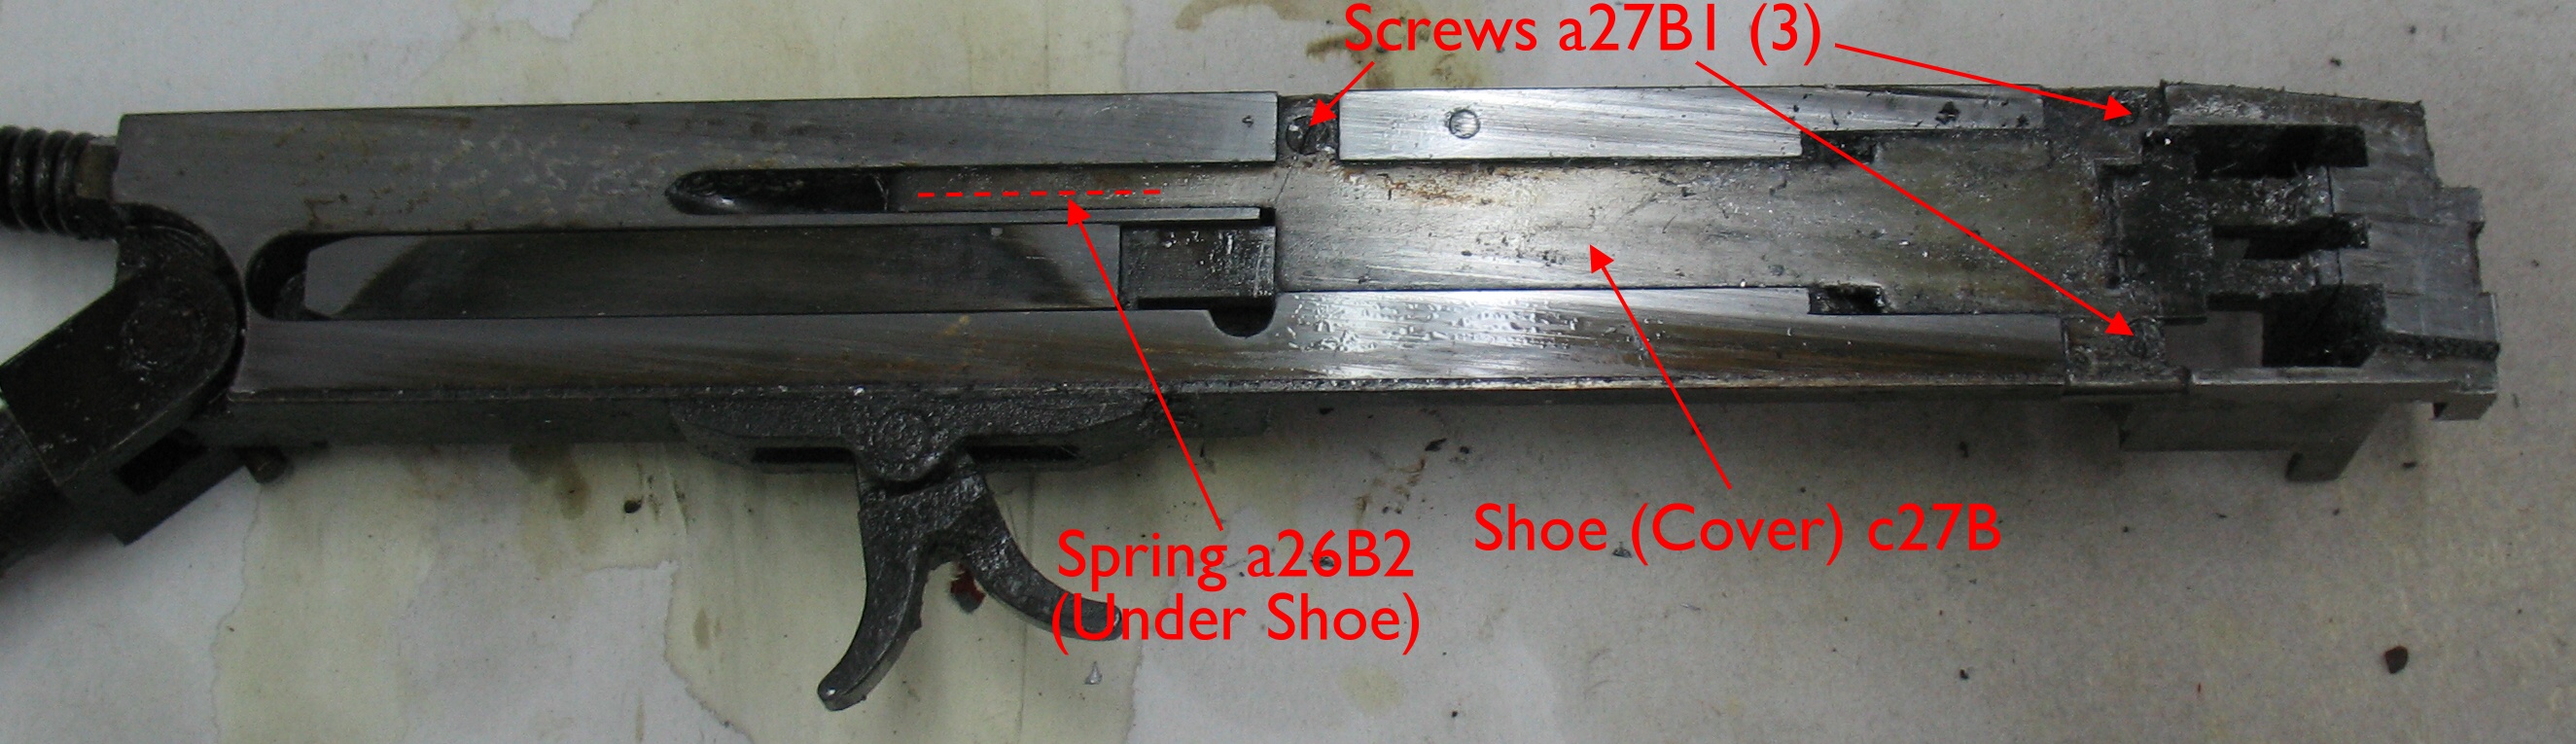
This shows the type carrier with the back facing up and the top towards the camera. The linkage rods are out of view to the left and were not involved in this procedure.
The first part to remove is the cover, officially called the Type Clamp Shoe. It is held on by three small screws, and has a tang which compresses a spring located under its left end. As you remove the cover be careful to allow the spring to extend in a controlled manner so you don’t lose it. This cover is quite a close fit in its recess so you may have to use a thin knife to lift it out. Start lifting at the right-hand end.
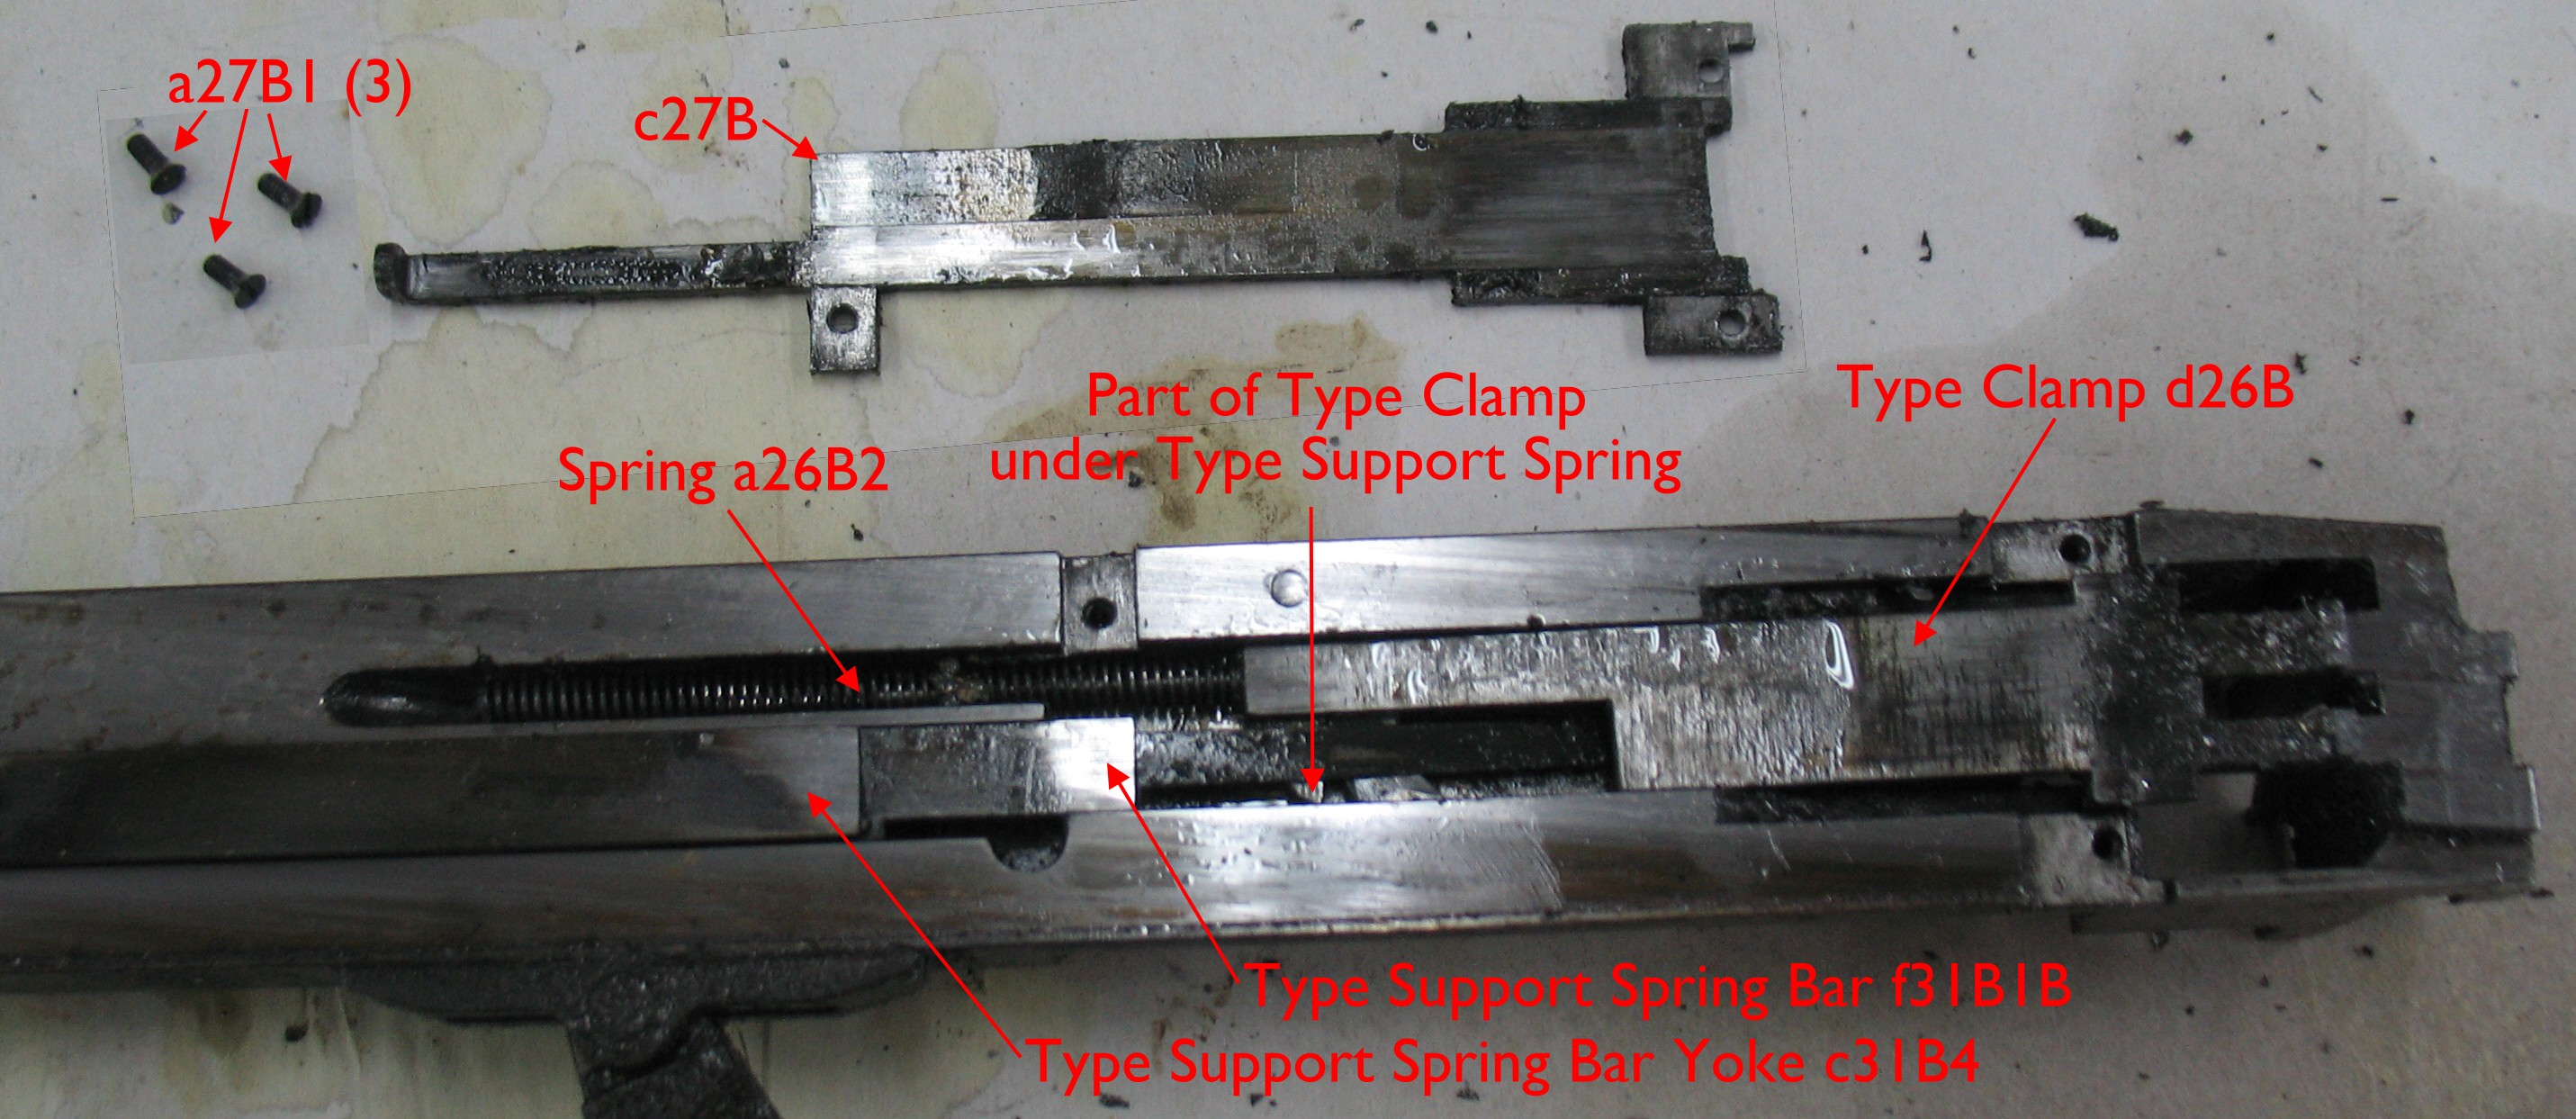
With the shoe off, most of the internal parts are at least partly visible. The type clamp is held closed by its spring a26B2 which in turn was compressed by the tang at the left end of the shoe. The Type Support Spring runs mostly under the Type Clamp but there is a small protrusion on the Type Clamp which is behind the Type Support Spring. This protrusion is what the lever presses against to open the clamp.
To remove the Type Clamp, use your left hand to gently hold the Type Support Spring and its associated parts in place while you use your right hand to lift out the Type Clamp. The support spring will start to come up with the clamp, but once the clamp is completely out of its groove it can be pivoted up and twisted to release it from the type support spring. The Type Clamp Spring and its guide rod should be removed if they did not come out with the clamp.
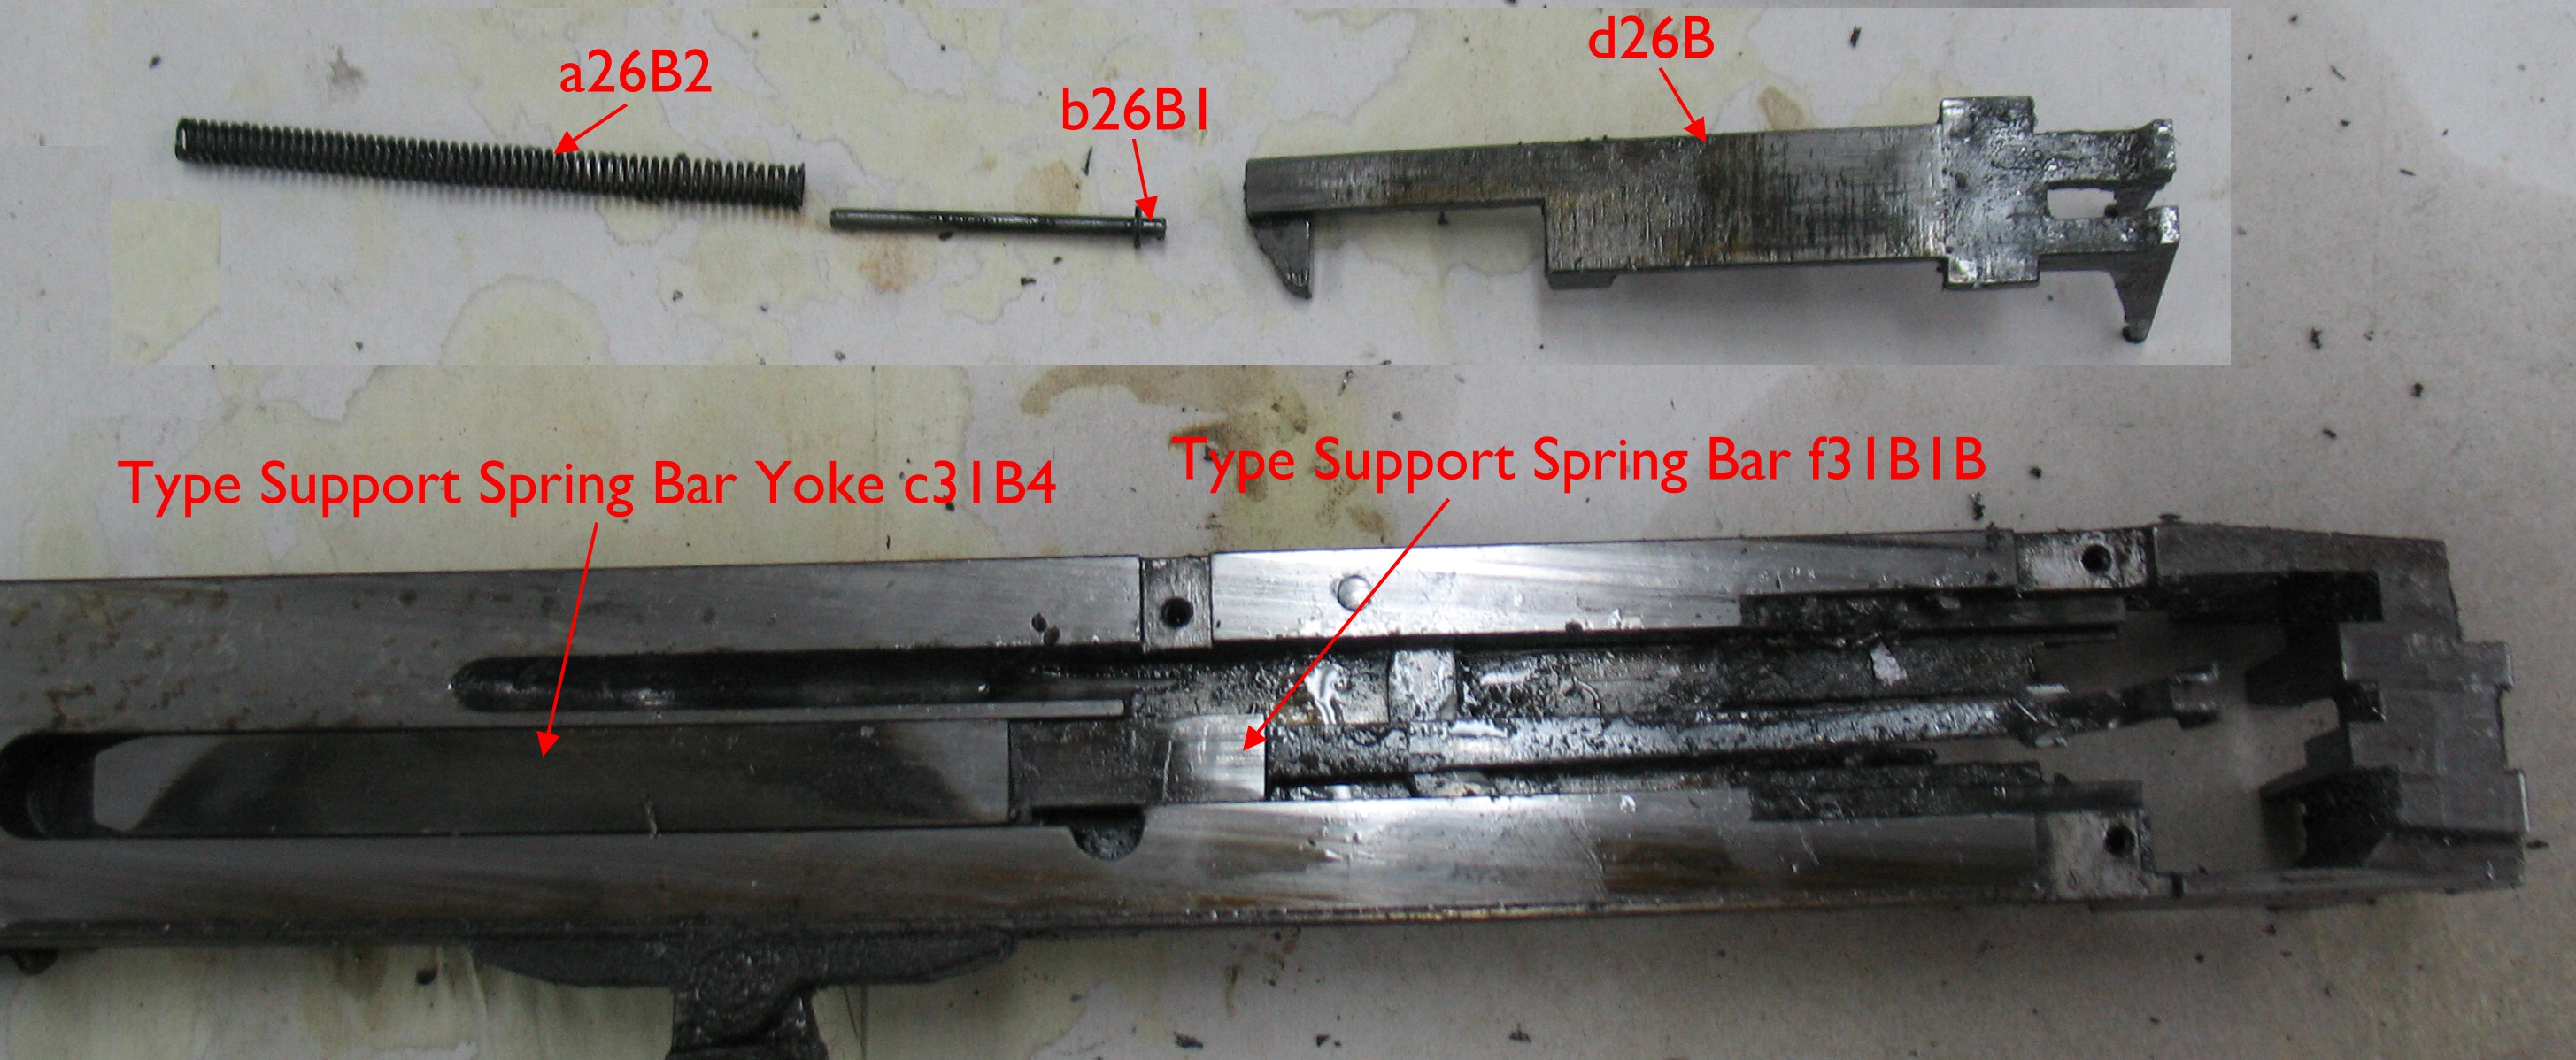
The Type Support Spring and its Bar Yoke are tenuously attached to each other but it should be possible to remove them as a single unit by just lifting them out.
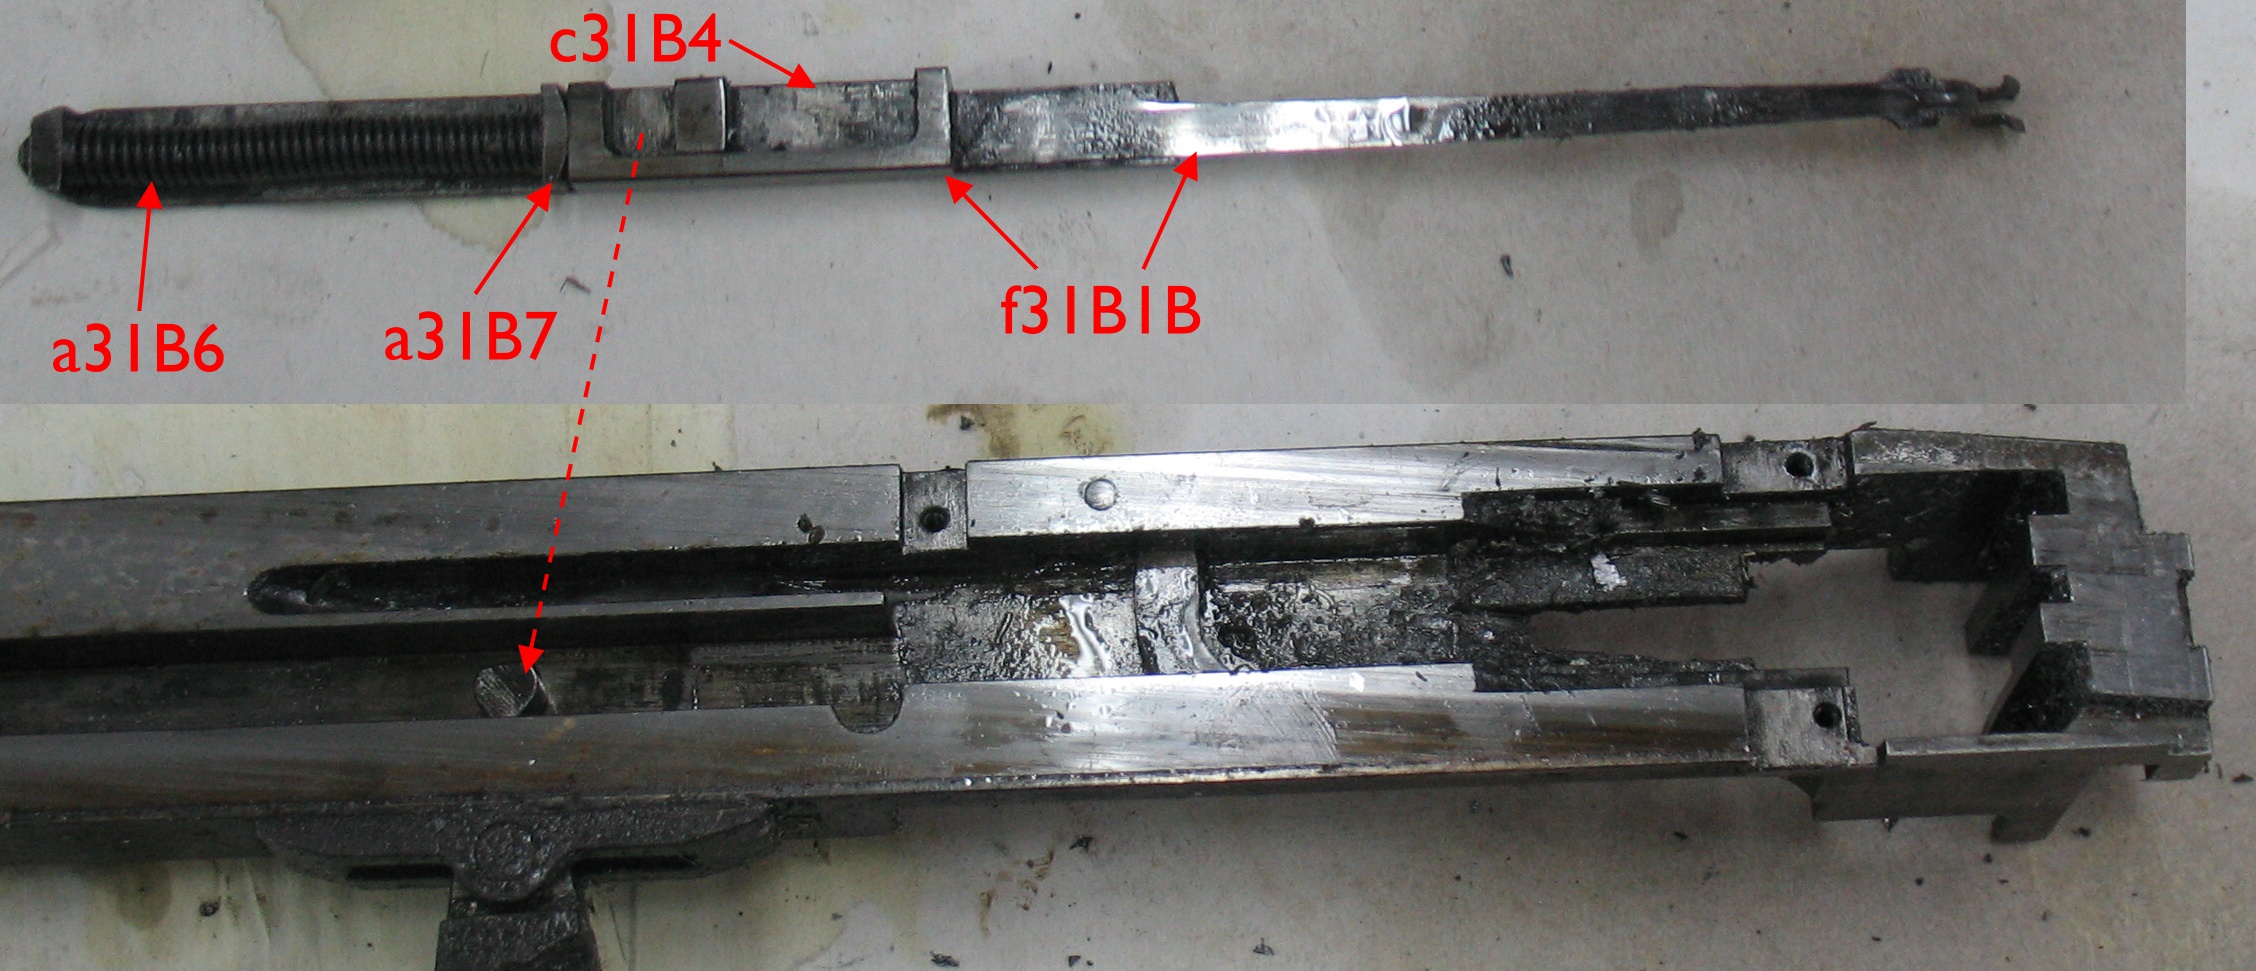
These parts are only held together by a small contact area. If this spot is worn and no longer has nice sharp corners, the pieces will tend to fall apart and, if you are not careful, may shoot across the room. The Type Support Spring is moved back and forth by the lug on the lever engaging in the spot as marked by the dashed arrow.

The Type Support Spring comes apart into the parts shown above. When assembled, the left end of f31B1 snags on the boss on c31B4 and is held against this by pressure from the spring. In use, if something is blocking the support spring from advancing towards the end of the type carrier, the spring compresses and only c31B4 moves.
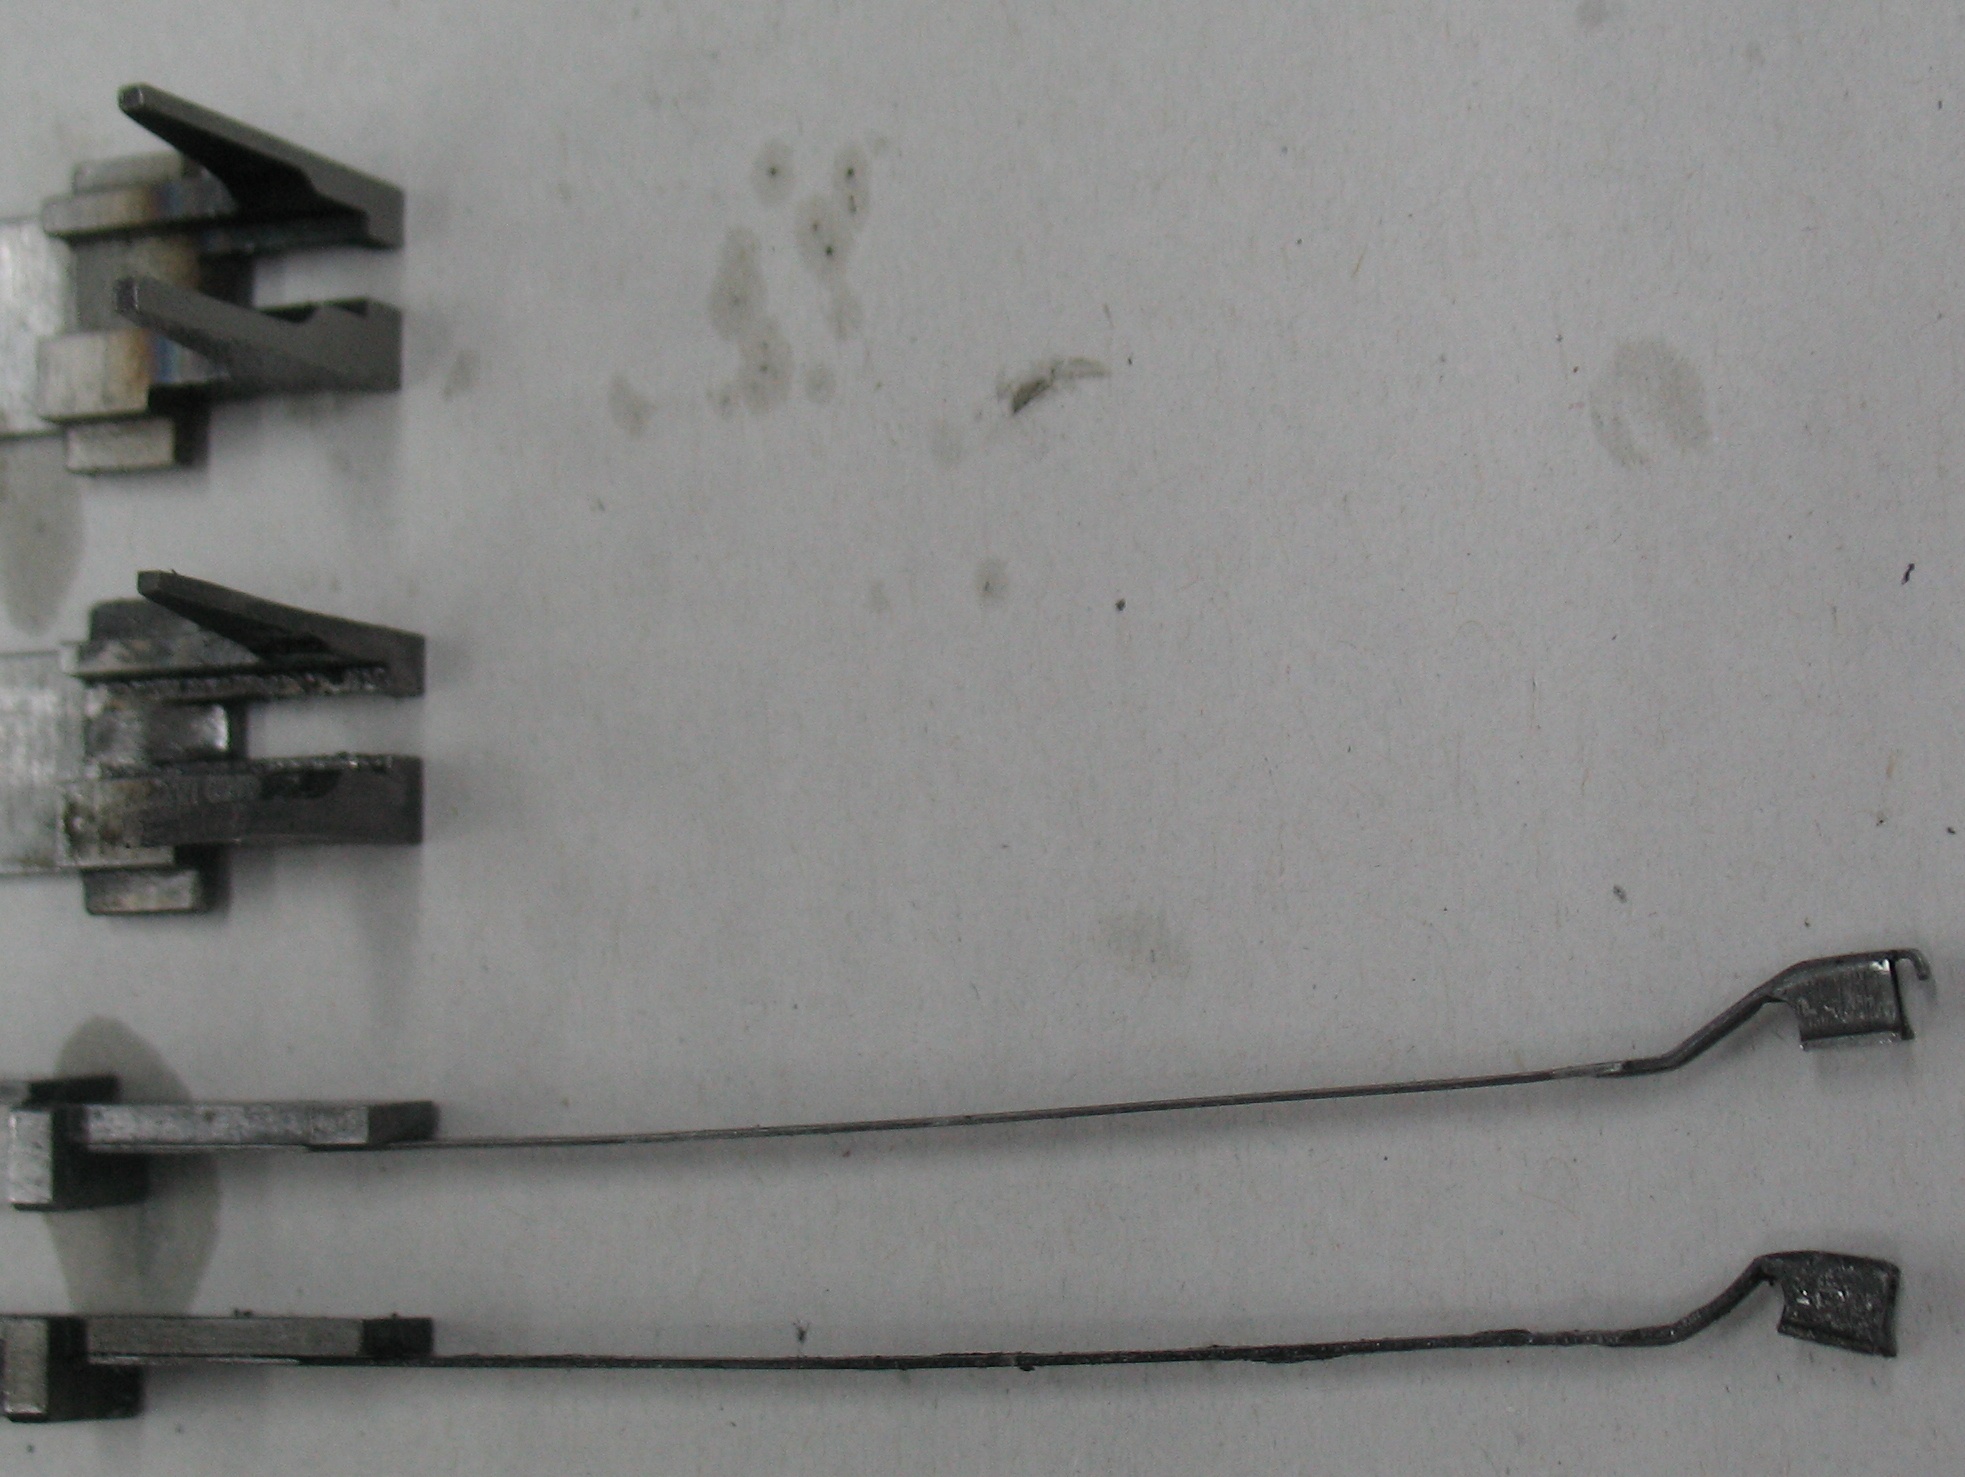 This shows the two damaged parts in my type carrier, with new (or perhaps like-new) replacements above them.
The prongs on the type clamp are splayed outwards and (although it does not show in the photo) also bent back.
The end of the type support spring is still bent out of shape, despite my attempts to straighten it, and is also missing its tip.
After cleaning all the parts, I reassembled the type carrier with the new type support spring, but I was unable to get the new type clamp to move smoothly so I bent the prongs on the old one back into shape as best I could and re-installed it.
I have two or three other type carriers in my spares so I may try mixing and matching type clamps to see how their fit varies. The parts manual does not contain anything implying that these would need to be specially fitted.
Once I reinstalled the repaired type carrier in my caster all the type started arriving in the type channel oriented correctly—no more sideways spaces! Unfortunately I still don’t know what actually happened to damage the support spring in the first place, and I only have a few more spares.
Leave a Reply