
With my test casting using the American display mould set up for 18 points I found that the feet of the type were wider (pointwise) than the heads of the type. This was probably due to dirt being caught between surfaces when the mould was assembled, so I took it apart again.
One thing I noticed right away was a fleck of what appeared to be type metal pressed into the side of the spacer I had made. On removing the fleck and looking with a magnifier I could see that the fleck had left a small dent in the spacer. Under a microscope I also saw other pits that had not been there previously. Here are a few of the most obvious ones:
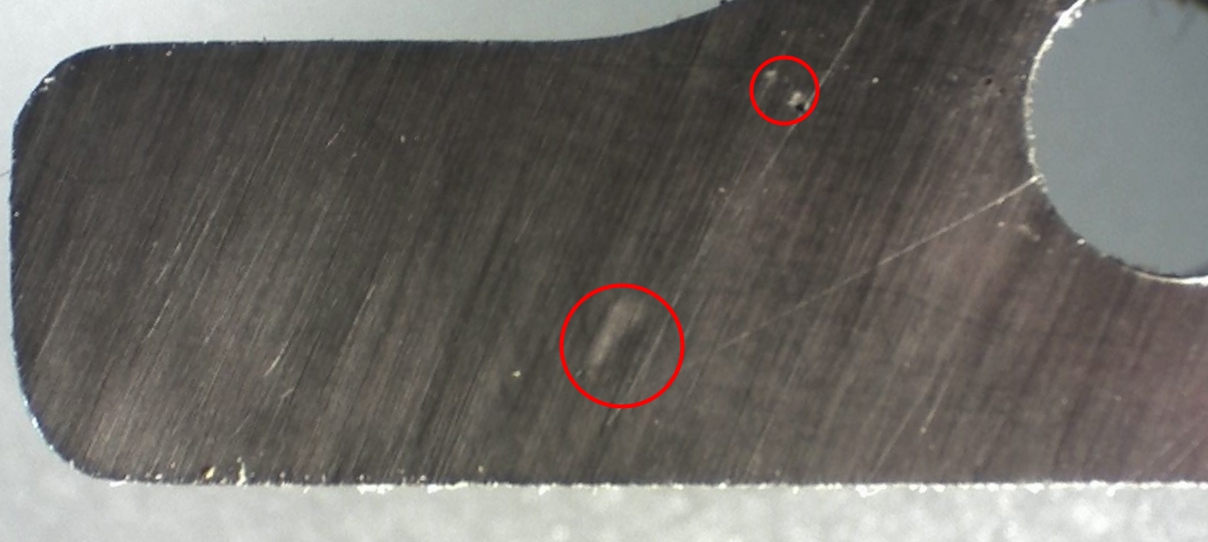
The larger circle shows the gentle dent left by the fleck of type metal. The smaller circle shows two sharper-edged dents from other unknown dirt.

The same view with different lighting
This side of the spacer is the one pressed against the fixed (left) type block. The pressure comes from tightening the long screw that pulls the type blocks together. The other side of the spacer has some scars as well; in this case the pressure comes from the small but strong spring located at the outer end of the moveable (right) type block.
With damage like this it looks like I should have used a hardenable steel after all for making this spacer. Each of these little craters has a small raised area around it from the displaced metal so I will have to polish those off before using it again.
Because the type blocks are held down to the squaring plate by several screws, I don’t think the dirt that caused these marks would throw the mould sides out of parallel, but given how much dirt was on this spacer I would not be surprised if there were dirt under the type blocks as well causing them to cant inward a bit.
To think that I thought I had everything very clean! I guess I’ll have to clean them and try assembling the mould again. If I can get type with consistent size I’ll be able to determine if my spacer thickness is correct.
One thing to note is that this part I’ve been calling the “spacer” is officially called the “Mold-Blade Point Block” and is part symbol 5MC1T1 (replacing 1T with 2T for newer moulds, and 1T/2T with 1U/2U for sizes 24 points and over). A booklet on the maintenance and repair of these moulds is available online at the Internet Archive. According to this document the newer ‘2’ moulds differ from the ‘1’ ones in that each mould was only supplied with a single size of blade, and that the nick was larger and positioned lower on the type.
Leave a Reply